Ethernet Cables Howto
In this page we will give the basic theory of Ethernet cables. We have diagrams of the color order of wires, instructions on how to make your own cables, and instructions on how to test cables you have made.
Basic Theory:
The cables used for Ethernet are usually called "Cat5" or "Cat6" cable. They are similar. A Cat5 cable has 8 wires of which 4 are actually in use.
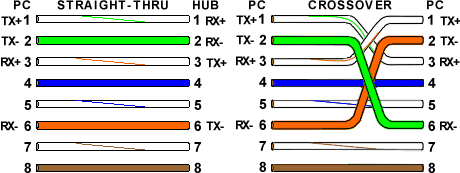
By looking at a T-568A UTP Ethernet straight-thru cable and an Ethernet crossover cable with a T-568B end, we see that the TX (transmitter) pins are connected to the corresponding RX (receiver) pins, plus to plus and minus to minus. You can also see that both the blue and brown wire pairs on pins 4, 5, 7, and 8 are not used in either standard. So why bother using these wires? It's just easier, basically.
The information listed here is to assist Network Administrators in the color coding of Ethernet cables. Often the color coding of network wires is confusing. With a few simple diagrams we will try to make it clear.
Ethernet Wire Color Order
There are two basic standards for ethernet wiring, called T-568A and T5-68B, which have the same wires but connect them in different order.
Most folks these days use the B style of connection. It's not a good idea to mix "A" and "B" especially within a single cable because the pin order will be wrong. In general, when in doubt, use "B".
Here's the order of wires for the "A" type cable.
T-568A Straight-Through Ethernet Cable
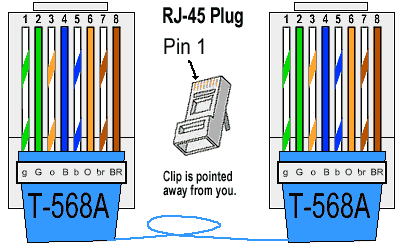
The TIA/EIA 568-A standard which was ratified in 1995, was replaced by the TIA/EIA 568-B standard in 2002. They are similar but if you look at the wire colors you can see that they are not the same. For example, in "A" the first wire is green/white while in "B" it is orange white. Note also the position of the dable end. If you look at it from the wrong side the wire order will be reversed.
Here's the wire order in a "B" type cable.
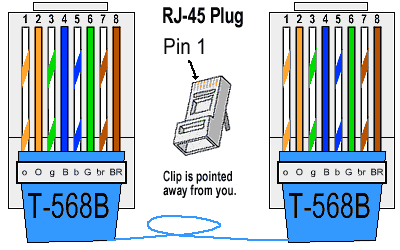
Both the T-568A and the T-568B standard Straight-Through cables are used most often as patch cords for your Ethernet connections. If you require a cable to connect two Ethernet devices directly together without a hub or when you connect two hubs together, you will need to use a Crossover cable instead.
Here's the wire order in a crossover type cable.
RJ-45 Crossover Ethernet Cable
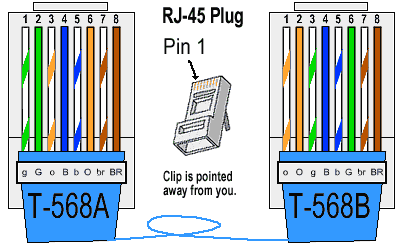
A good way of remembering how to wire a Crossover Ethernet cable is to wire one end using the T-568A standard and the other end using the T-568B standard. Another way of remembering the color coding is to simply switch the Green set of wires in place with the Orange set of wires. Specifically, switch the solid Green (G) with the solid Orange, and switch the green/white with the orange/white.
Making a Cable
You can buy spools of cable and cable ends to make your own cables. It's pretty easy. You need a crimping tool which usually can also cut the cable.
Here are the parts you need:
Crimping Tool:
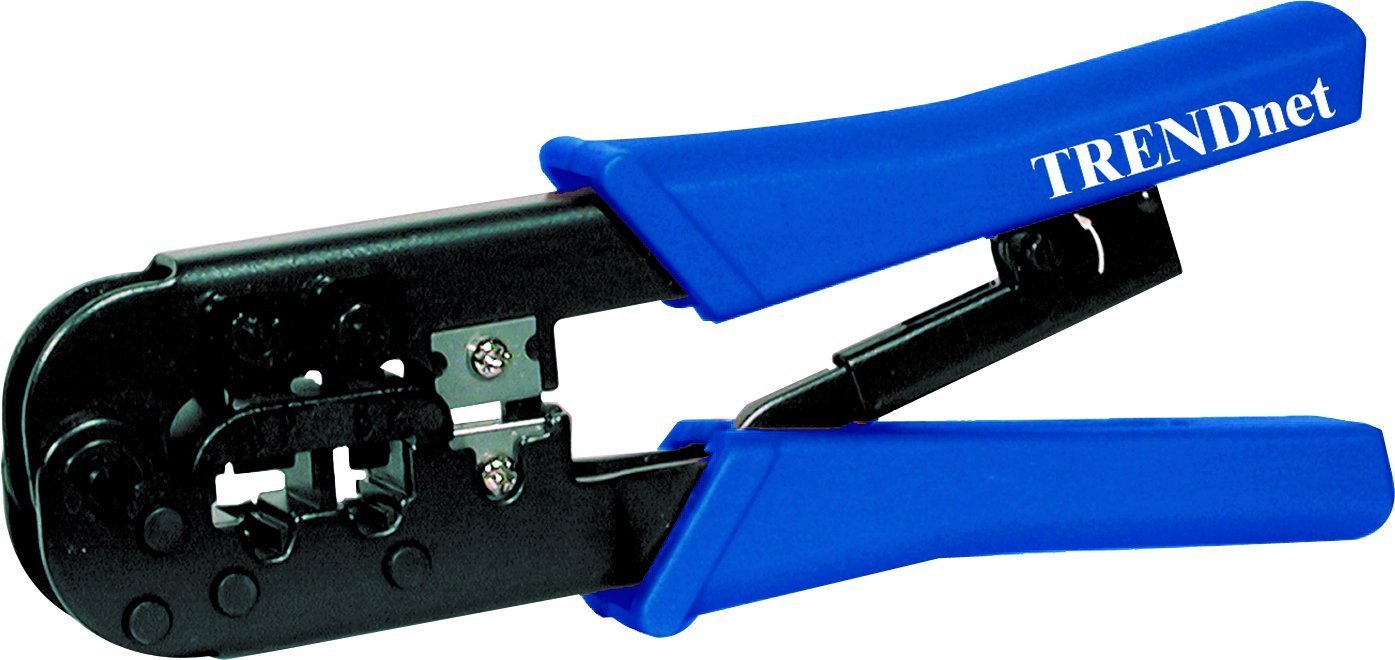
These are readily available at computer stores such as Frys or Radio Shack. The one pictures above costs $14 on Amazon.
Cable Ends:
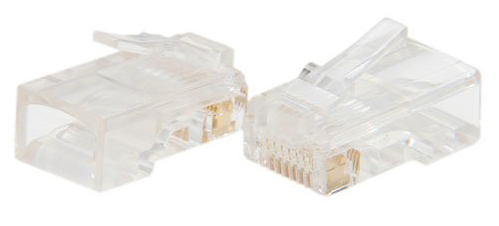
These are also avialable at any computer store. They are a little bit expensive at Radio Shack - about $7 for a little packet of about six. The ones pictured above are about $6 for 100 on Amazon.
Bulk Cable
Big boxes of ethernet cable for making your own cables is available at any good computer store.
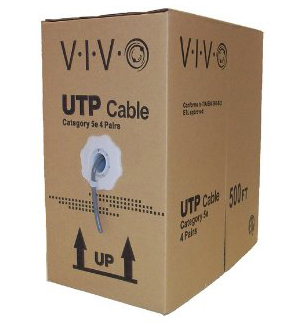
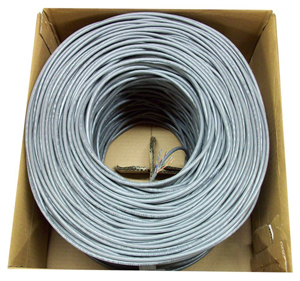
Pictured here is a spool of 500 feet of bulk ethernet cable, which will make a lot of short cables. This is copper clad aluminum, which is probably not as good as real copper cable, but cheaper. This box is $32 on Amazon. Aluminum conducts well but is not quite as nice a material as copper.
Procedure for making cables
- Pull the cable off the reel to the desired length and cut. If you are pulling cables through holes, its easier to attach the RJ-45 plugs after the cable is pulled. The total length of wire segments between a PC and a hub or between two PC's cannot exceed 100 Meters (328 feet) for 100BASE-TX and 300 Meters for 10BASE-T.
- Start on one end and strip the cable jacket off (about 1") using a stripper or a knife. Be extra careful not to nick the wires, otherwise you will need to start over.
- Spread, untwist the pairs, and arrange the wires in the order of the desired cable end. Flatten the end between your thumb and forefinger. Trim the ends of the wires so they are even with one another, leaving only 1/2" in wire length. If it is longer than 1/2" it will be out-of-spec and susceptible to crosstalk. Flatten and insure there are no spaces between wires.
- Hold the RJ-45 plug with the clip facing down or away from you. Push the wires firmly into the plug. Inspect each wire is flat even at the front of the plug. Check the order of the wires. Double check again. Check that the jacket is fitted right against the stop of the plug. Carefully hold the wire and firmly crimp the RJ-45 with the crimper.
- Check the color orientation, check that the crimped connection is not about to come apart, and check to see if the wires are flat against the front of the plug. If even one of these are incorrect, you will have to start over. Test the Ethernet cable.
Ethernet Cable Tips:
- A straight-thru cable has identical ends.
- A crossover cable has different ends.
- A straight-thru is used as a patch cord in Ethernet connections.
- A crossover is used to connect two Ethernet devices without a hub or for connecting two hubs.
- A crossover has one end with the Orange set of wires switched with the Green set.
- Odd numbered pins are always striped, even numbered pins are always solid colored.
- Looking at the RJ-45 with the clip facing away from you, Brown is always on the right, and pin 1 is on the left.
- No more than 1/2" of the Ethernet cable should be untwisted otherwise it will be susceptible to crosstalk.
- Do not deform, do not bend, do not stretch, do not staple, do not run parallel with power cables, and do not run Ethernet cables near noise inducing components.
Testing a Cable with a Cable Tester
In order to test a cable, you will need the following device, which is a cable tester.
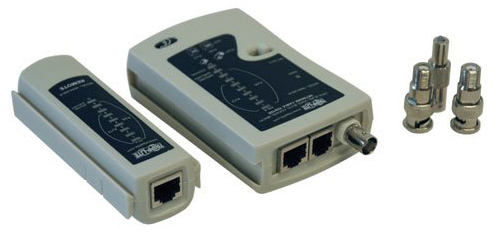
Like the other items shown here, this can be bought at a good computer store like Frys. The unit pictured above cost me $25 on Amazon and so far has worked flawlessly. You need a 9v battery. There are much cheaper units available for less than $3. I don't know if they are any good.
Testing a cable is easy.
Put the smaller device at the far end of your cable. It snaps on. If one end doesn't fit, try the other end of the device.
Then put the tester on the near end of the cable. There are two ethernet jacks, just use whichever one fits.
Now turn on the device.
The lights will turn on one at a time, 1, 2, 3, 4, 5, 6, 7, 8.
If any of the lights skips, that wire is bad.
If the lights come on out of order at the remote end, then you have crossed wires.
That's all there is too it. It's super easy, if you have the right tools.
Reference: http://www.incentre.net/ethernet-wiring-diag.html


