


Configuring Trendnet Routers
Trendnet is an inexpensive Chinese brand of Routers that should work just fine. These instructions will show you how to set one up.
Installation
We will assume that you have a separate modem and that it is configured correctly.
We will also assume that you have a good dsl signal. Check the lights on the modem. The dsl light should be solid green. The exact place to look for this depends on the brand of modem, so check the instructions if you are not sure.
Connect the modem to the router with an ethernet cable. This diagram will show you which port to use:
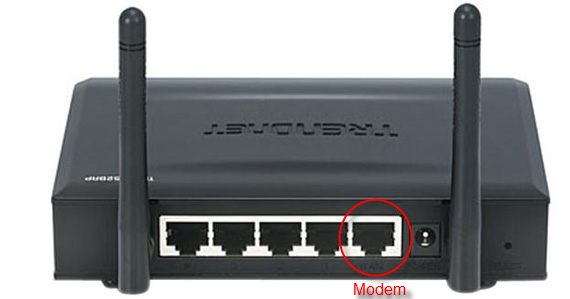
Next, connect another ethernet cable from your Computee to one of the other ethernet ports in the router. Do NOT connect it to the modem port.
Note: Do not try to configure via WiFI. That makes things a lot harder. If your computer doesn't have an ethernet port then borrow a computer that does, or get a USB to ethernet adapter. You can buy these at Apple ($29) or on Amazon ($8).
Restart your computer and you should be connected to the Trendnet device.
Configuration
We want to configure two things on our router. We must configure the WAN connection, and we must configure the Wireless to give our WiFi network a name and a password.
The router has a configuration web page built inside. We will access this page via numerical address.
Open your favorite web browser such as Explorer, Chrome, or Firefox. Give it the address 192.168.0.1 and the router should ask you for a username and password. Try username = admin and password = admin. These are the default values.
There are several versions of configuration software for these routers so the menu choices will depend on what model you have. We will show examples for several different models. They are all basically the same but the menu items are moved around a little bit.
There is also a configuration wizard that you can use, but I prefer to configure by hand. Either way will work so it is up to you.
The menu layout varies from year to year. For example here's one version from 2012:
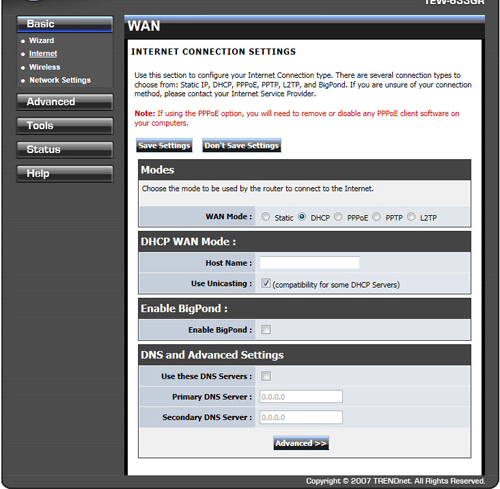
The connection settings are found under "basic" -> "Internet" and the WiFi settings are found under "Basic" -> "Wireless".
The settings are pretty much the same regardless of how the menu is arranged.
Setting up PPPOE
Click "Network" and select "WAN Setting." Or it might be called "Basic" and then "Internet". Select "PPPOE" from the Connection Type drop-down menu. You will need to enter the PPPOE username and password which were given you you. You will not be able to guess these. Click "Apply."
On the AC1750 Dual Band Wirless Router the menu choice is "Advanced" -> "Setup" -> "Wan Setting".
Set the "Connection Type" to PPPOE.
You will need to enter a username and password, which will be somewhat similar to the ones in the picture below.
Note: if your modem is set to do PPPOE then the router should use DHCP.
When you are ready, your configuration may look something like this:
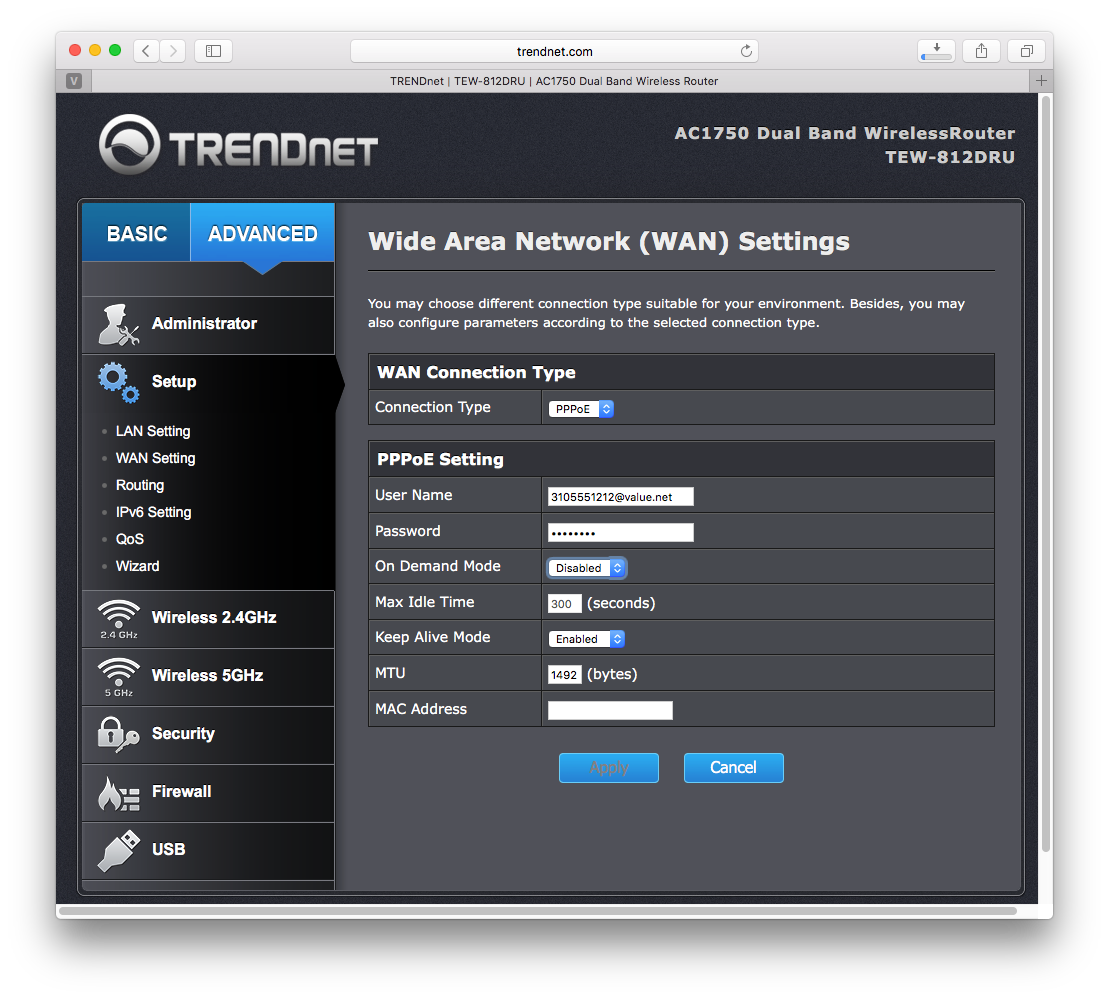
Click on "Apply" to save your changes.
Setting up DHCP
Click "Network" and select "WAN Setting." Or it might be called "Basic" and then "Internet". Select "DHCP" from the Connection Type drop-down menu. Click "Apply."
On the AC1750 Dual Band Wirless Router the menu choice is "Advanced" -> "Setup" -> "Wan Setting".
Set the "Connection Type" to DHCP.
Leave the other information such has "Host Name" blank.
Note: if your modem is set to do PPPOE then the router should use DHCP.
When you are ready, your configuration may look something like this:
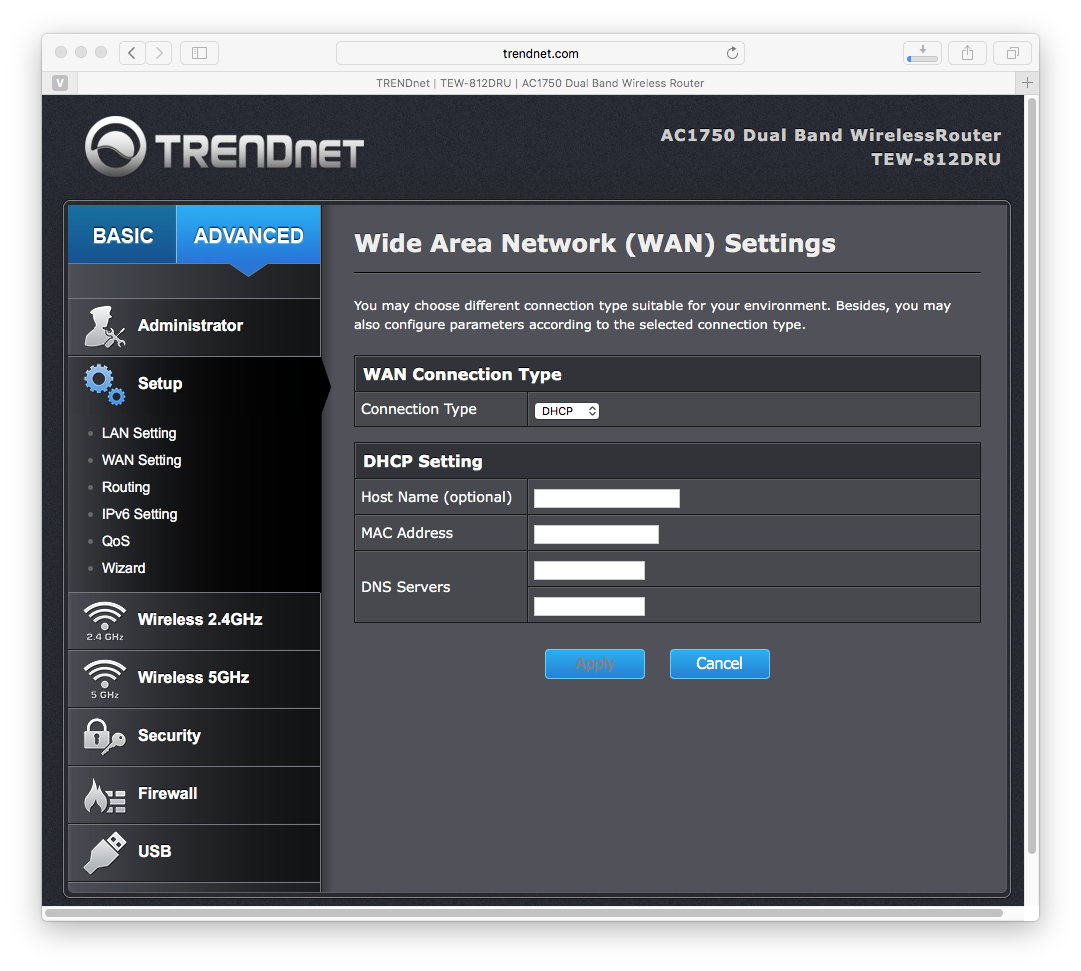
Click "Apply" to save.
Setting up WiFI
Click "Wireless" and select "Basic." Enter a unique name for the network into the Wireless Name (SSID) field. We usually use "Brand X Internet"t but you can call it anything you like. Click "Apply."
Now we need to set the WiFi password. Choose "Security" from the Wireless menu. Select "WPA2-PSK" as the Security mode.
Enter a unique passphrase into the Pre-Shared Key field; the passphrase can consist of eight to 63 alphanumeric characters or 64 hexadecimal characters. When we set them up we usually set this to "11111111". Click "Apply" to finishing setting up the TRENDnet device.
For the AC1750 Dual Bank Wireless Router the sequence is similar.
Select "Advanced" -> "Wireless 2.4GHZ Settings".
We usually set the SSID (Network Name) to "Brand X Internet" but you can set it to anything you like.
Set the security mode to EKIP+AES and set the "WPAS Passsphrase" to a password you like. We usually set this to "11111111".
When you are done it should look something like this:
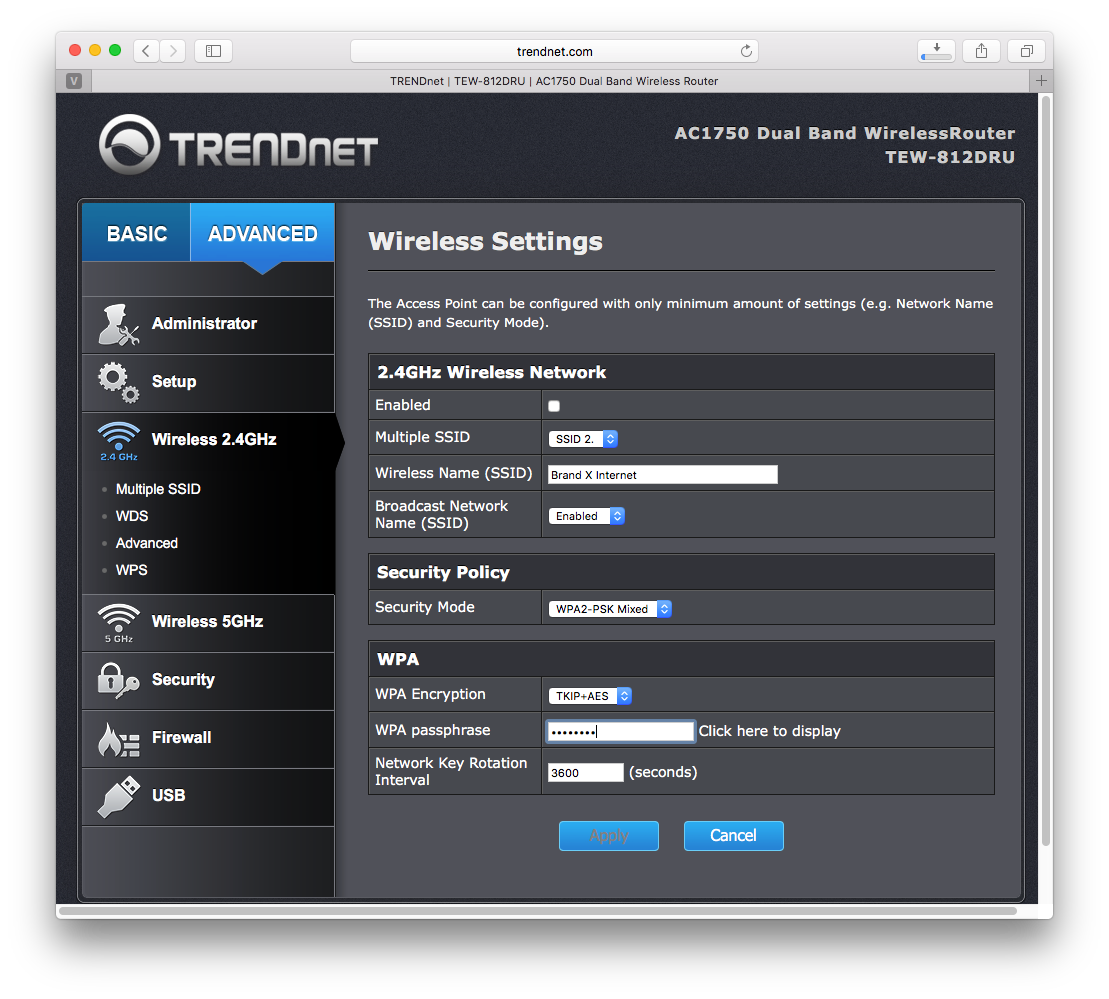
Click "Apply" to save your settings.
For the AC1750, because this is a dual band device with two transmitters, you have to repeat this for the second transmitter.