Setting up a Netis Wireless Router
These are very inexpensive routers available at places like "Mac Mall". They are currently on sale for $13, and they totally work. Hard to beat that.
I'm going to assume here that you have a DHCP connection on Brand X DSL, and want to add a wireless router.
The manual is located here: http://www.vientin.com/uploads/product/1298012172_2404-CDN.pdf
Cabling
Plug your telephone line into the modem.
Plug an ethernet cable from your modem to the "Wan" port on the Netis. The "Wan" light on the Netis should come on.
Plut an ethernet cable from your computer to one of the "Lan" ports on the Netis. The corresponding "Lan" light should come on.
Do not go to the next step until you have good lights.
Network connection
Set your computer to use DHCP.
Here's what that looks like in my Mac network configurations.
If you know how to set up a mac this should be easy.
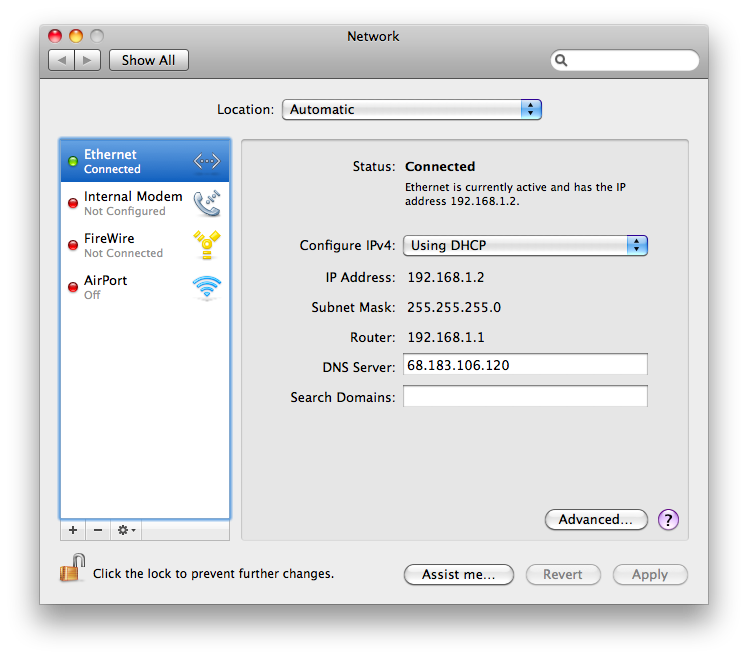
To make sure this is working, you can go to "advance" and "tcpic" and ask it to renew the lease. This will make sure you have a fresh working ip address. The ip address you get should be the same, or at least, similar, to the one in the picture above.
Windows
If you are on windows, select "My Network Places", left click "Properties", right click on "Local Area Connection".
That will take you to this window:
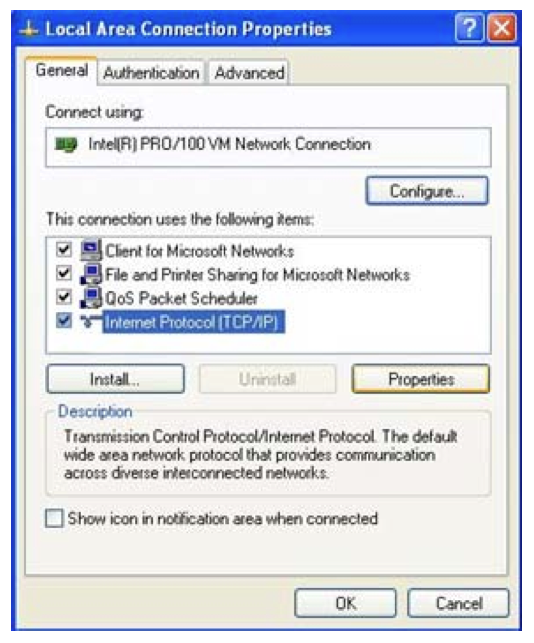
Select "TCPIP" and then select "Properties". The following window will come up:
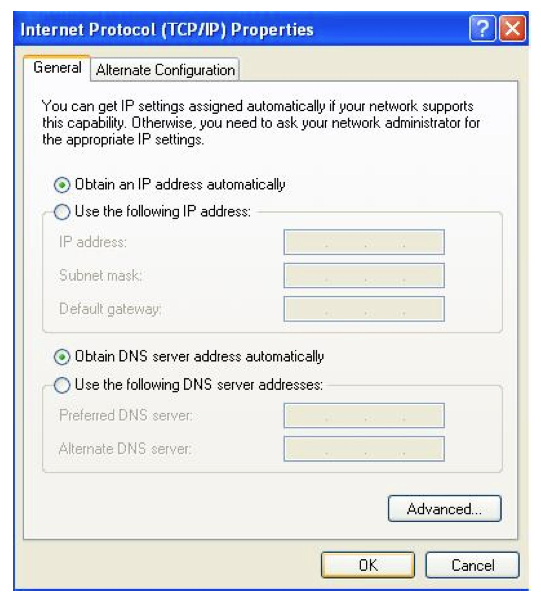
Set "Obtian an IP address automatically" and then set "Obtain DNS server address automatically".
Click OK, OK, OK, and exit network configuration. You should be ready to go to the next step.
Connect to the Router
We will make a web connection to the router. Type the address "http://192.168.1.1" into your web browser and you should see the password page for the router. Username=guest Password=guest.
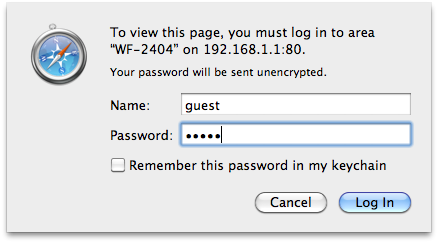
This will take you to the Netis router welcome screen.
PATIENCE. It takes a minute or two.
Take a deep breath, and let's start configuring.
Here's what my router looks like when I first set it up, before I have configured anything.
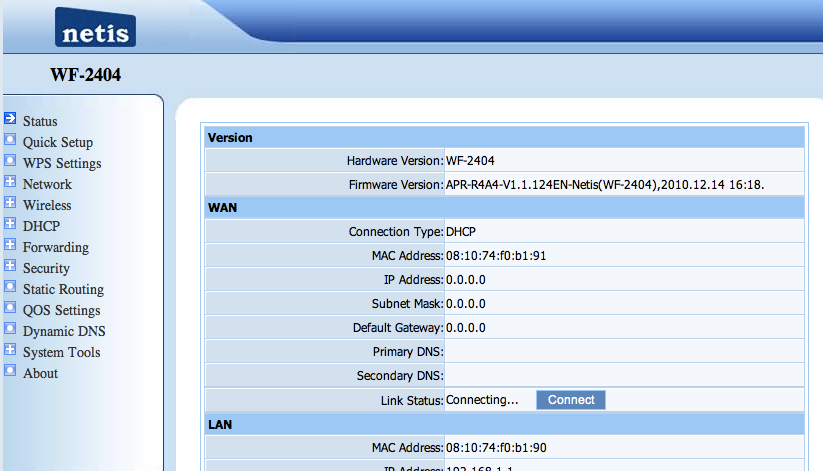
There are two things I need to configure; the wireless connection, and the dls connection.
Configuring the DSL Connection
Right now my router is configured for DHCP. See that setting, in the "Wan" section?
For most users that will be sufficient. Hit the "Connect" button and see if you can get it to connect. It should.
My connection is a premium DSL service with a static address. Here's how to set that up, if you have a static address. If you aren't sure, you probably don't have a static address, and can skip this step.
From the Netis router home screen, select "Network" and then select "Wan" and plug in your connection information. This should be provided to you by Brand X, your ISP. When you are done it will look a little bit like this, though the numbers will be a bit different:
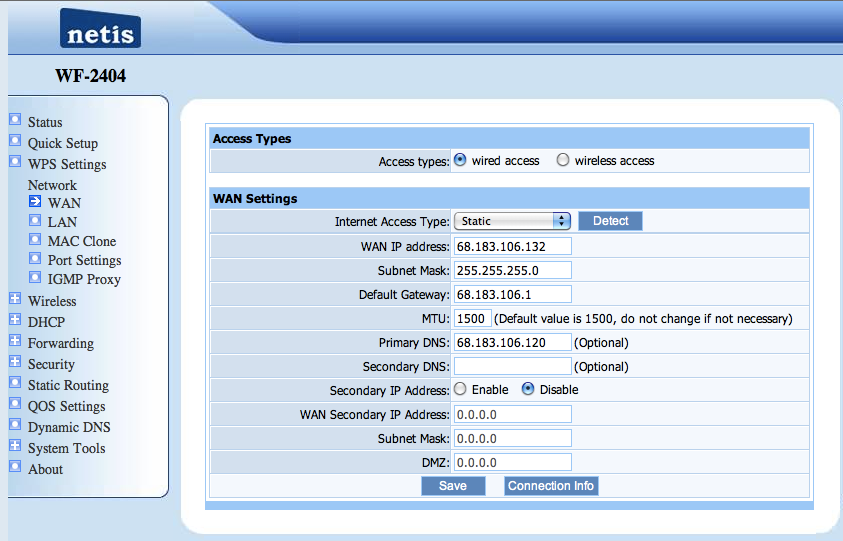
Click "save". The router will save your settings, but will need to reboot to put them into effect. Click "Reboot".
When the computer comes back, you should be online.
Configuring Wireless Settings
The Netis Router comes with default name "Netis". We will make sure the wireless is on, change the SSID to something a little more unique, and set the password so that other people won't be tempted to piggyback on our network connection.
Here's how to turn the network on and choose a name. Select wireless -> Wireless settings. You will probably want to choose a different SSID.
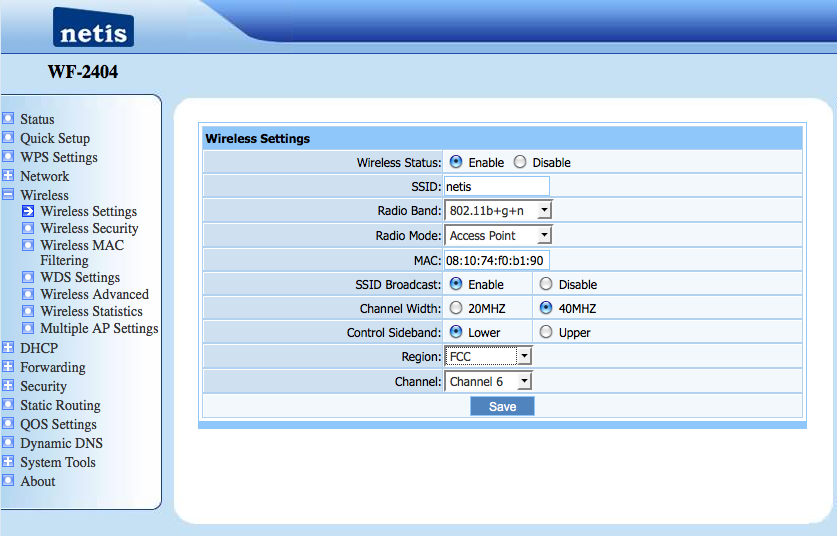
Here's how to set the security and password. You will probably want to choose a different password. Set everything and then hit save. The router will want to reboot, but don't do that yet, as we must also set a password. Select network -> Wireless Security and then set it following this model:
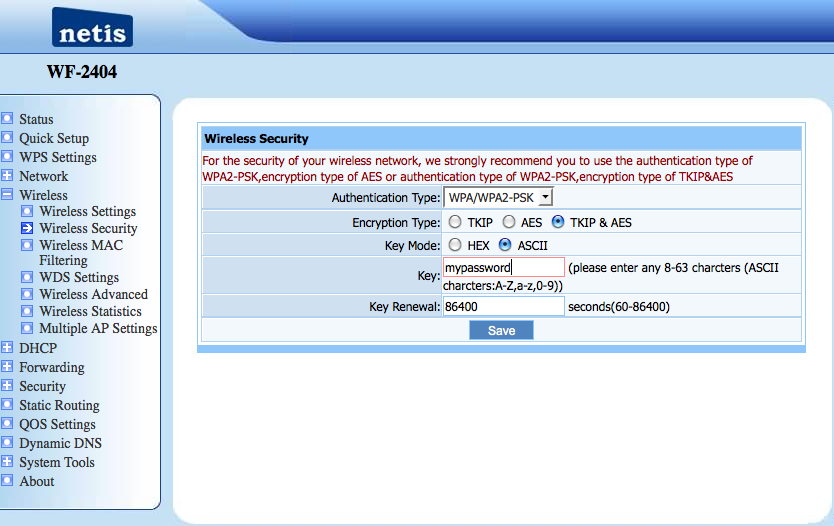
Save.
Hit the reboot button to restart the router.
You should now see the router in your list of wireless devices, and you should be able to log in with the password you set.


