


Actiontec C1000A Setup instructions
These instructions will show you how to set up the Actiontec C1000A Modem/Router which was obtained refurbished from Century-Link. This is a great modem with excellent high speed DSL, ADSL2, and VDSL capabilities, and gigibit ethernet. It is very inexpensive and should provide fast and stable service for all needs.
Configuration Strategy
In configuration we will do two things. We will set the DSL connection type, and we will set up the wireless network.
This device can be set up for PPPOE, DHCP, or Bridge Mode. DHCP is what is used in most cases and that's how the device usually comes by default. PPPOE is only if your ISP tells you to use PPPOE. Bridge mode is for when you have a separate router.
If you are not sure, DHCP is the safe choice.
Once you have set up the connection you will also want to set up the wifi. You will need to tell the router your WiFi SSIS, or network name, and you will want to give it a password.
Let's get started.
Connect the Router
Plug in the router and make sure the power light comes on.
Connect a telephone cord from your phone jack to the green plug labeled "DSL" in the back of the router and give the router a minute or two to sync up.
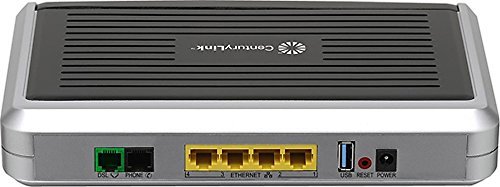
You should get a solid green light for DSL. The DSL light is on the front of the router next to "Power". A blinking DSL light is bad. Other lights can blink but this one should be solid.
Red light for the dsl light means there is no signal. On some other routers, red means a router failure, but here it's just no signal.
If you are having trouble getting a signal it could be the wrong telephone jack, or the service may not be on, or there may be a wiring problem.
You must have this working before you go to the next step. There is no point in trying to configure the router if you have no DSL signal.
If you are trying to fix problems in a circuit that used to work, and you don't have a signal, then don't start reconfiguring the router. The signal issue must be fixed before you try do any configuration.
Access the Router
The router has a web page in it that we will use for configuration. Connect an ethernet cable from your computer to the router into any one of the four yellow ports in the back.
Turn off your computer's wifi. We are not using wifi right now.
If you have a Macbook with no ethernet port, this is no good. See if you can borrow a laptop from a friend that has ethernet. You really need ethernet. A laptop with no ethernet is not suitable for setting up routers.
Now open your favorite web browser such as Firefox or Safari and type in the following numerical address:
192.168.0.1
This goes in the address bar. It's not a search.
The login page for the Actiontec comes up, asking you for the Administrator username and password.
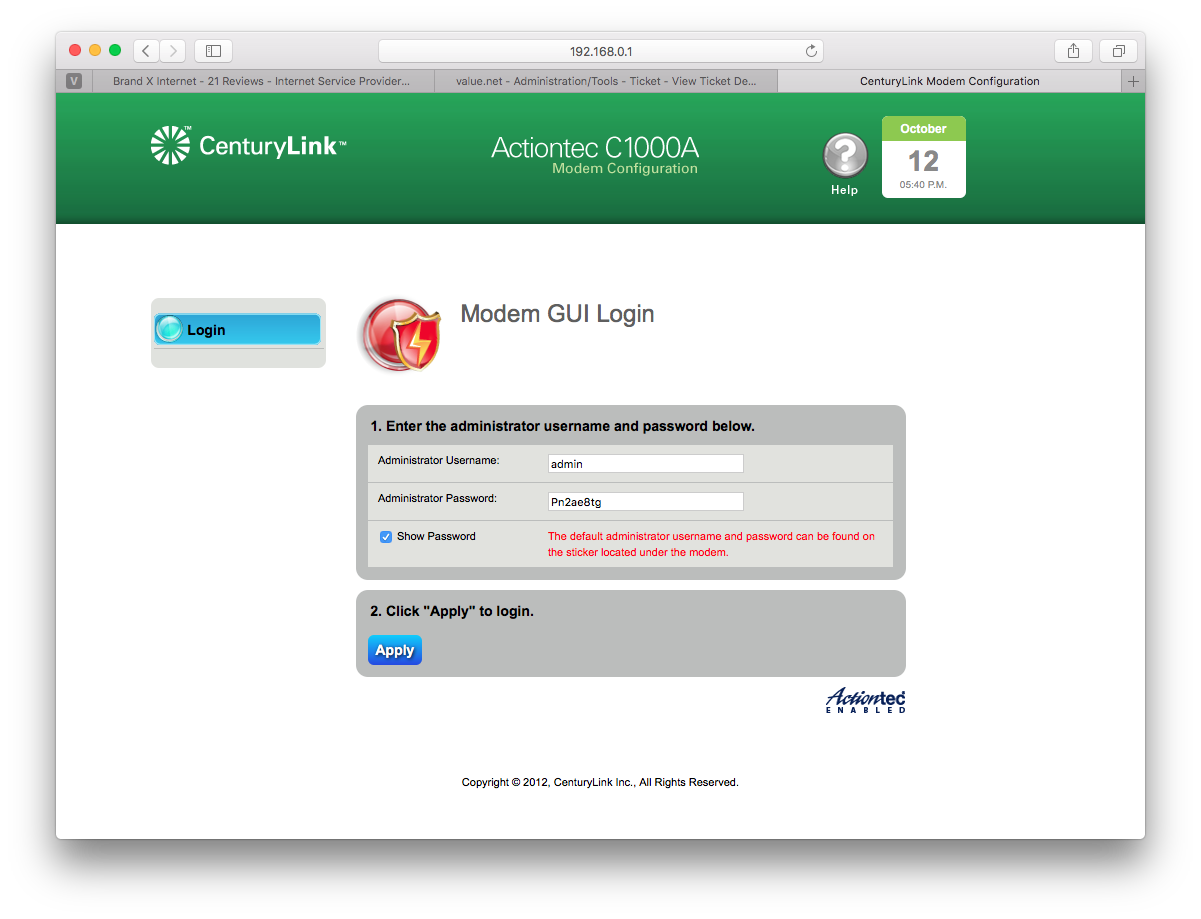
The username is "admin". The password is different for each router but should be on a sticker on the back of the router. Mine says the password is "Pn2ae8tg".
If you are unable to log in, the router may have been configured and the password changed. If you are totally unable to log in, try resetting the password by hard resetting the router with a paperclip. However, be really sure about this as if the router is set up and you reset it, you have to start over.
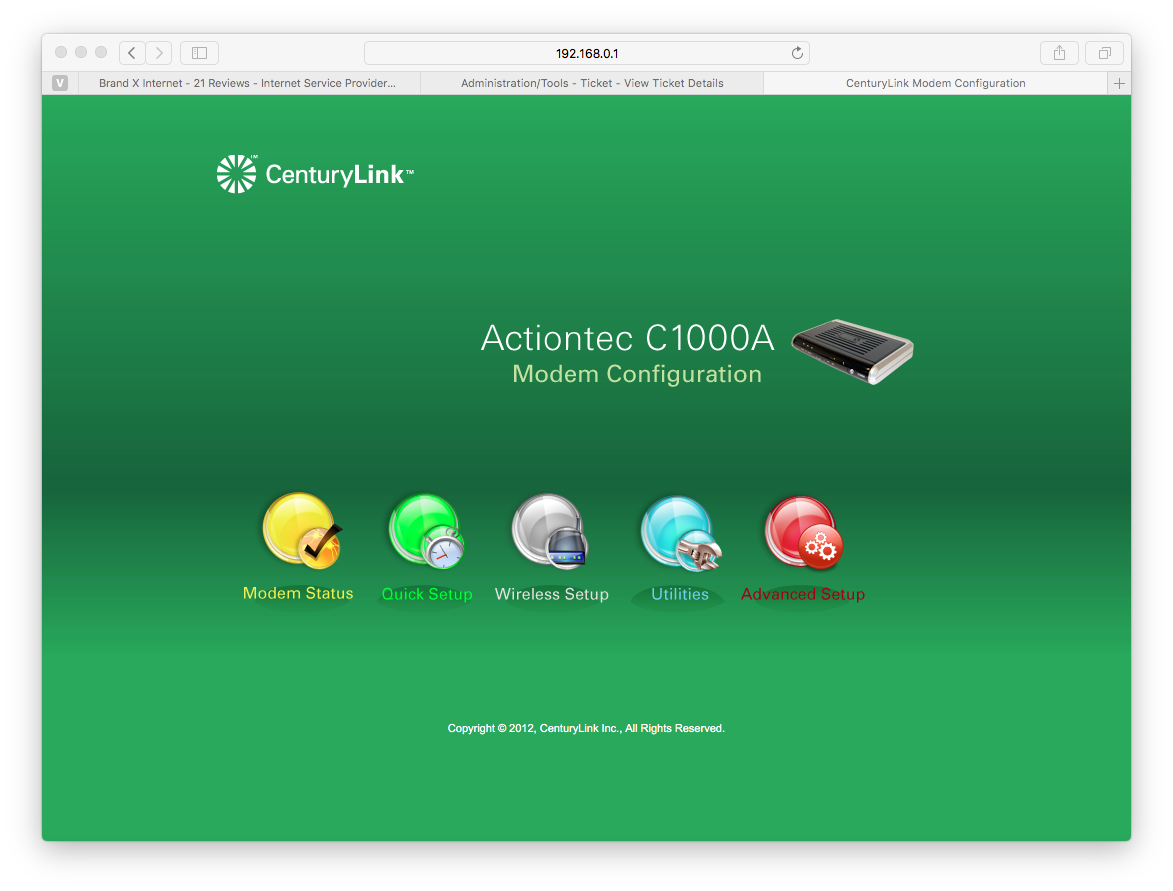
Once you have logged in, this takes you to the Actiontec C1000A start page.
I'm going to click on modem status and see what things look like.

In this case, I'm already online.
Looks like this router was already set up for dhcp so it just went ahead and got online. Nice. That's how it came out of the box.
Yours might or might not do this.
The connection status is
Dsl = connected
Internet = connected
Ip address = 47.137.6.199
Speed is 11.766 mb down 1.183 up.
That means this connection should be working nicely.
If your router is already connected then you can probably skip down to the WiFi section, but for now I'm going to show how to configure the connection.
Configuring the Connection
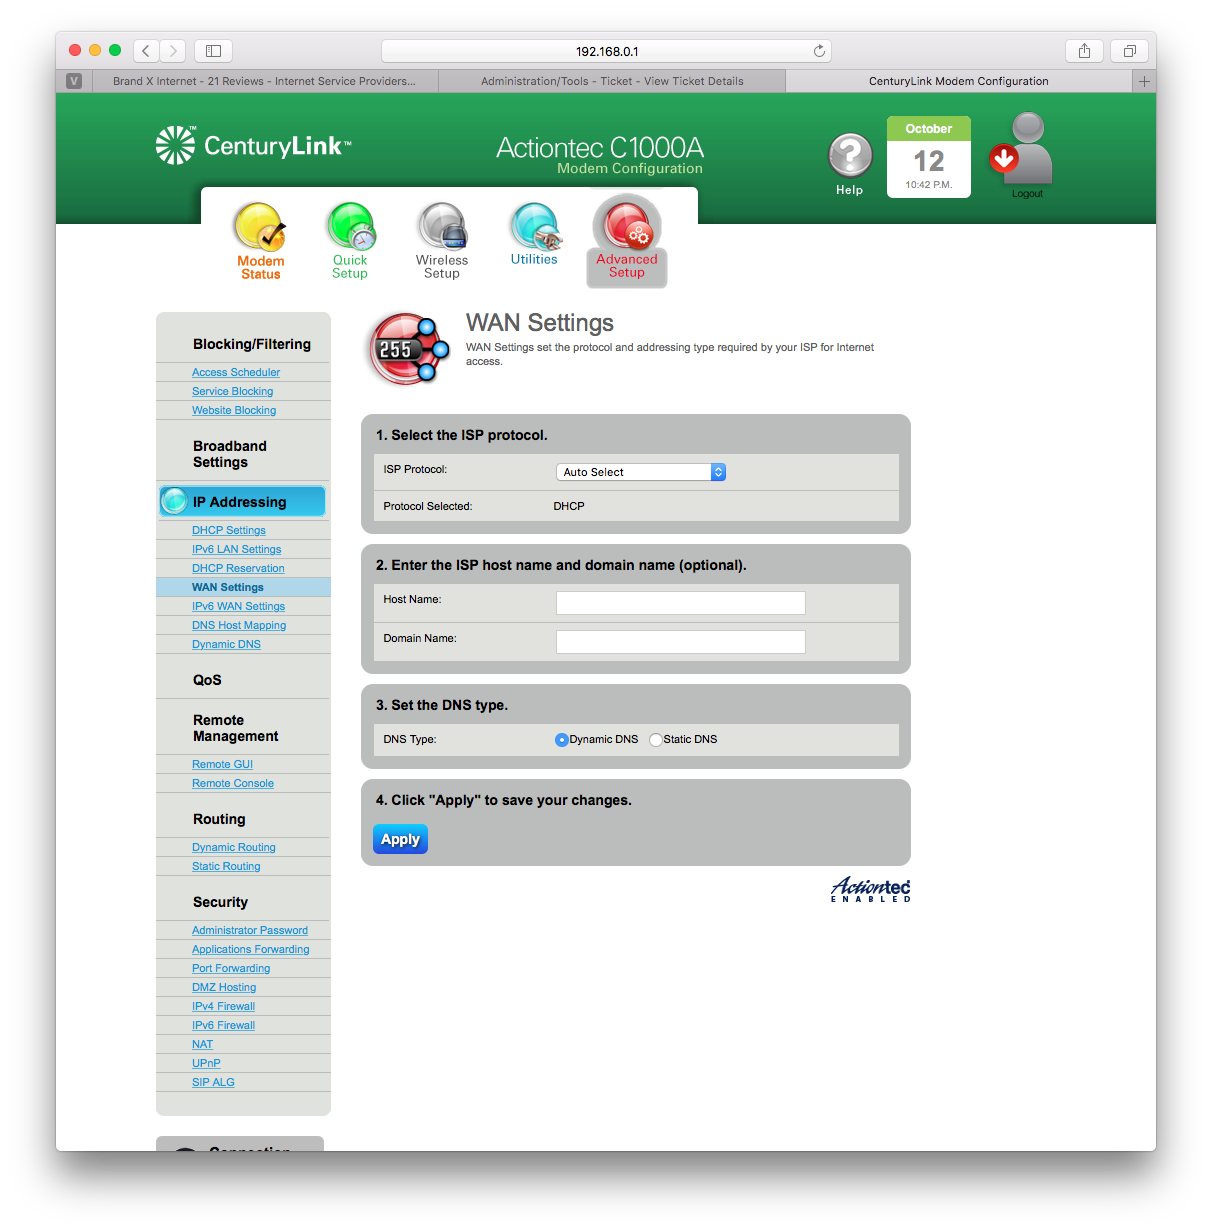
Ignore the "Quick Setup", it's useless. We want "Advance Setup". Click on it, then from the next page select "Broadband Settings" and then "Wan Settings". This we where we set up our connection.
What you do next will depend on the type of connection you are setting up: DHCP, PPPOE or BRIDGED.
DHCP
For DHCP, set the ISP Protocol so "DHCP". It's usually set up this way by default anyway.
Click "apply" and the router will save and restart. then go to modem status and see if you are online.
PPPOE
For PPPOE, set the ISP Protocol to "PPPOE" and then enter thePPPOE username and password that we gave you. You won't be able to guess this so if you don't know what they are call us and ask us. If you don't have a username and password your connection may be DHCP.
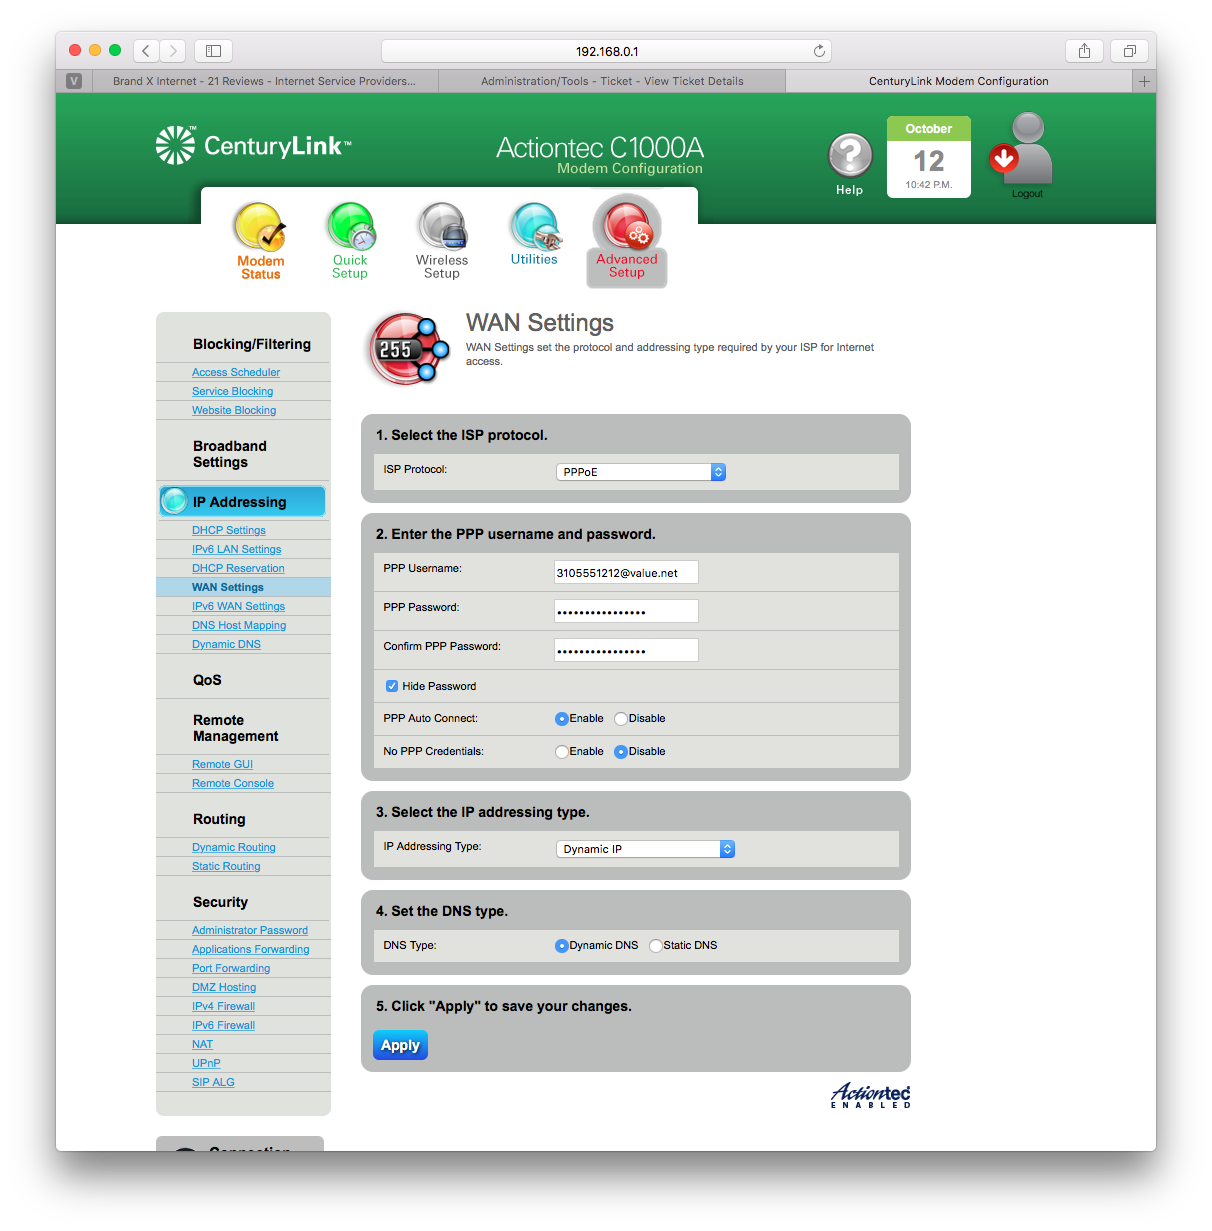
Click "apply" and the router will save and restart. then got to modem status and see if you are online.
Bridging
If you are on DHCP or PPPOE then this one is NOT for you.
If you are setting up bridging then select "Transparent Bridging 0/35"

This is not enough to get you online, you will have to do the rest of your setup on your other router device, but you are done configuring the Actiontec.
Click "apply" and the router will save and restart. Now you can go configure that other device.
Configure DNS
This optional step is for PPPOE or DHCP.
This device comes preconfigured to use telephone company DNS. Their DNS is used to show you ads you probably don't want to see. Any time you mistype an address it will send you to the telephone company page. I hate that.
Let's use Google DNS instead.
Have a look at the image up above of "PPPOE" which shows where the menu choice is..
Select "Broadband Settings" -> "Wan Settings" -> "Set the DNS Type". Change this to "Static DNS".
This will configure DNS to manual instead of automatic (via DHCP or PPPOE). Set the name servers to:
8.8.8.8
8.8.4.4
Then save.
Configuring WiFi
From the start menu of the router select "Wireless Setup" This will take you to the "Basic Settings" page. 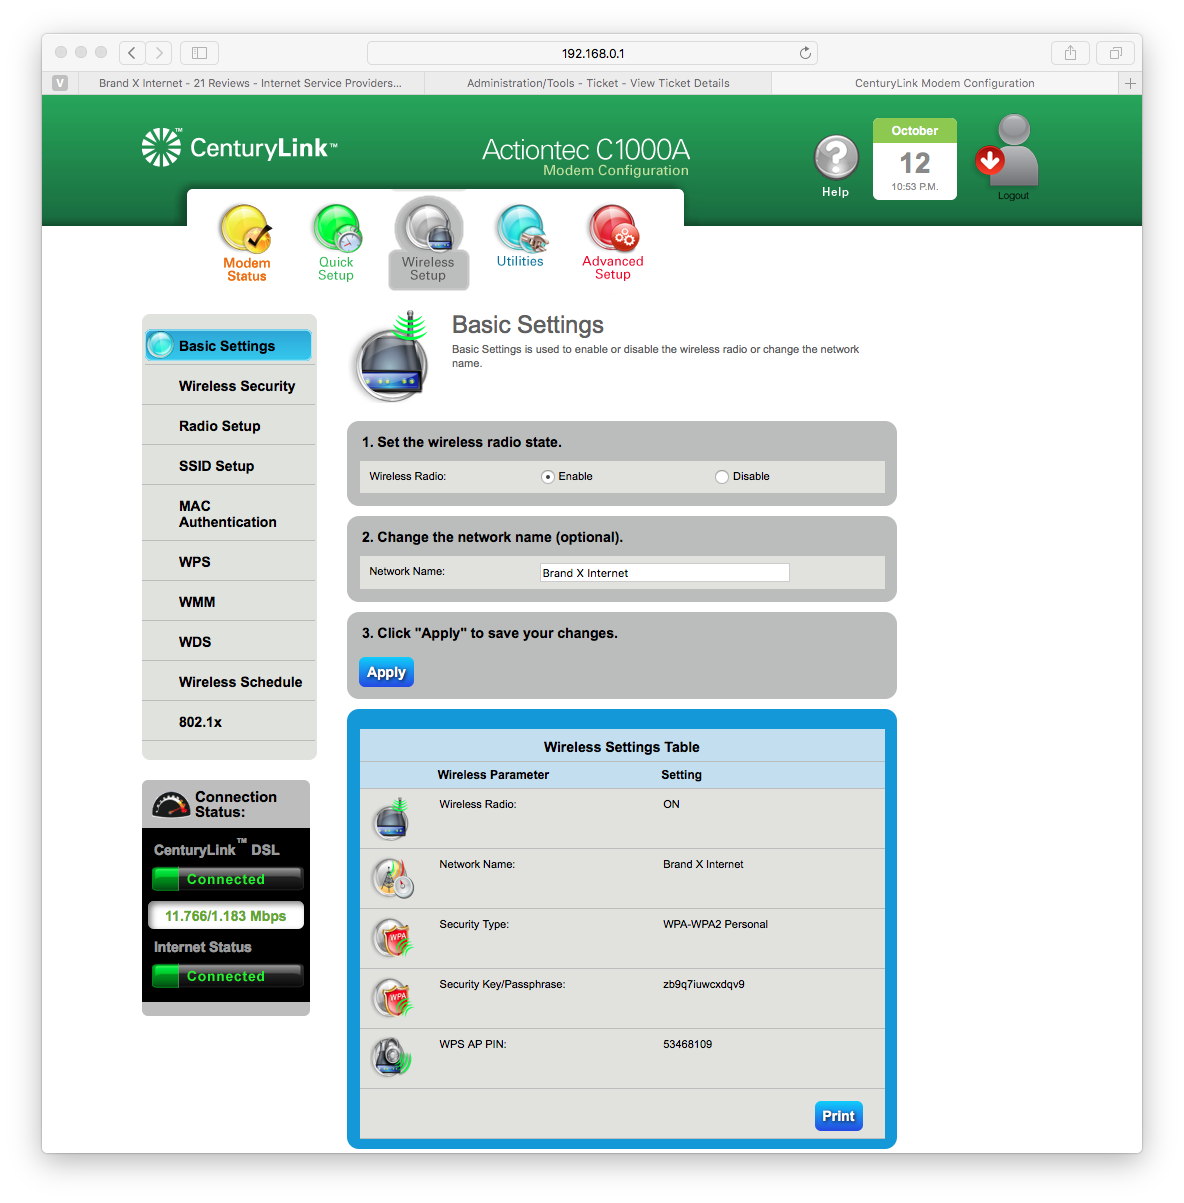
On this page we set the "Network Name" I'm calling is "Brand X Internet".
Hit apply. The router will save and restart. It takes a moment so be patient.
Now let's set the password. Click on "Wireless Security" in the menu at left.
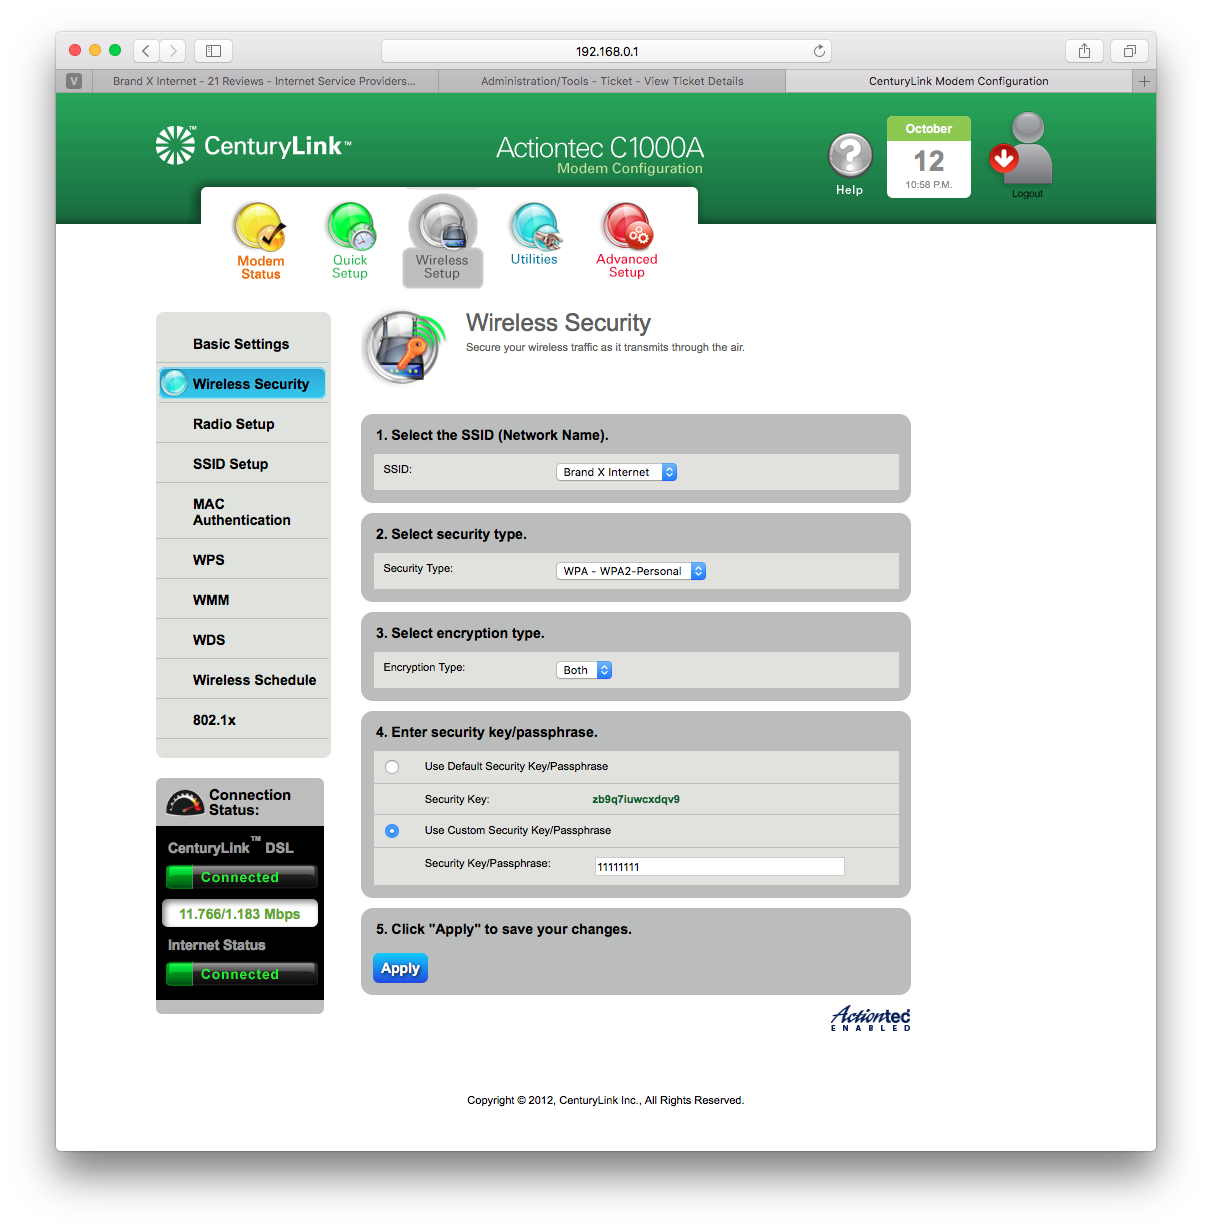
I'm putting in the following settings
SSID = Brand X Internet
Security Type = WPA-WPA2 Personal
Encryption Type=both
Security Key = use customer security key
I'm going to set the password to "11111111" because it is really easy and I'm not all that concerned about my wifi security. If you work in defense or in a bank this is probably a bad idea but for my home it is ok.
Click Apply and the settings will be saved.
When the router comes back, we are done.
Check the status page to make sure you are online.
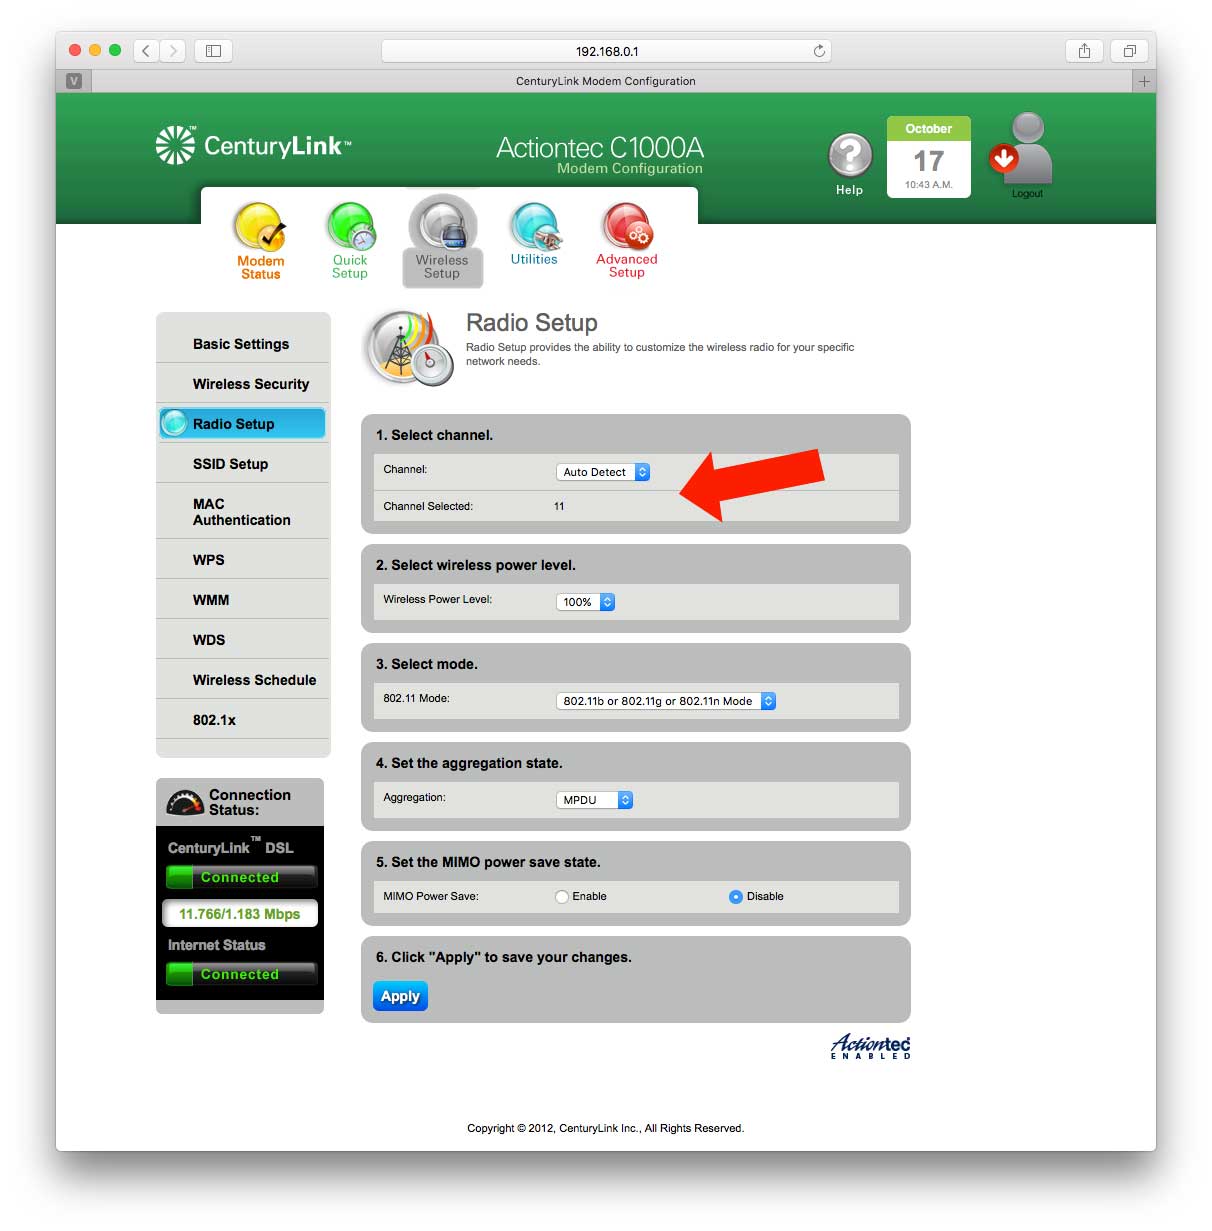
Configure Radio Channel
This normally isn't necessary, but if you are having trouble with WiFi it may help to configure it to use a different Radio Channel. If one channel is busy, try another channel, right?
This is located in the menu under Wireless Setup -> Radio Setup.
The default value is 11 but you can try other channels if you like.
Your devices should find the router regardless which channel you are using.
Problems
This setup is pretty easy, so the most common problems have to do with no dsl signal.
* Are your sure your line has been turned on already?
* Do you have a good dsl signal? Check the DSL light on the front of the modem. If that is not on it's not going to work no matter how much you configure.
* If you don't have a good signal, are you sure you are using the right jack? More than once this problem has been solved by locating another jack and plugging in there.
* If you have a good DSL signal and can't get online, is the connection types set correctly?
* If the connection type is PPPOE, double check the username and password. Yours will be different than the ones listed here. If you re not sure, call us.
* If you don't have a good signal and can't get one, call us and we will try to help. Sometimes it's a wiring problem. We can help with that.
