


DSL Wiring for Standalone DSL - Brand X Internet
This page will show you how to do the wiring to hook up standalone dsl.
It will also help you know what to look for if you are trying to see if Verizon has installed and "tagged" the dry loop line. Often we can't even tell for sure if Verizon has really installed anything. This page has pictures and will show you what to look for
Brand X Internet has a flat rate $25 charge for wiring jacks and hooking up DSL in the Santa Monica area or nearby areas. But you can do it yourself.
What is Standalone DSL?
Standalone DSL is DSL on a telephone line that has no voice service. This kind of phone line is called a "dry loop". It saves you the expense of having a landline, which is currently about $35 a month.
Verizon really hates Standalone DSL. They are losing about half a million landline customers a year. They try to increase the sale of landlines by requiring landlines for dsl.
Legally they are on thin ground. As part of the agreement they made with the Public Utilities Commission (PUC) when they purchased GTE, Verizon is required to allow standalone dsl by third party internet services.
Verizon tries to fight standalone dsl by making installation difficult. We call this "strategic incompetence". Most of the time they install DSL to the wrong apartment or leave the wires hanging out of the wall in the phone closet. We need the wires to connect to a jack. We don't get mad, we just find out what is wrong and we fix it. We absolutley will not let them stop us from installing our dsl lines.
Set up the Modem and check for DSL Signal
If you have a Westell Wirespeed modem, check the "ready" light on your modem. If you have a solid green light, no further wiring is needed.
If you don't get a solid ready light, be sure to give it a few minutes. Make sure you do NOT have a DSL filter on the line. Make sure the telephone cords are snug. Plug and unplug them, wiggle them around, try and see if you can get it to work. Turn the modem off and on. Wait 5 minutes.
If you have another brand of modem such as Netgear, the light that shows a DSL signal may be labelled "dsl" or something like that.
Refer to our support pages for your modem for details, found at http://www.brandx.net/support.html.
Just a check: are we sure that the installation is done? Sometimes people get frustrated trying to install a DSL line that isn't ready yet. You may want to double check with Brand X support to make sure that your line installation is really ready before trying to install.
If the "Ready" light continues to blink, you don't have a dsl connection and any attempt to configure your computer to get online is a total waste of time. We need the solid ready light.
If you have the solid ready light, you are done and you can start configuring your compuer to connect to the internet.
If you have a blinking light, you don't have a dsl signal at the jack. We need to do some cabling to get this going. Go to the next step.
Find the Phone Closet
Let's find the incoming DSL line.
The wires from the phone company come in a big bundle of fifty or a hundred or so color coded wires, from the telephone pole, which probably connects to the back of your building some place. If you go out to the street or alley and look at the telephone pole you can probably see this wire coming in and someplace near this, you will find what I call the "phone closet". This might be a closet, or it might be a cabinet, or it might be a metal box on the wall. In my building on 6th Street in Santa Monica, it's a kind of makeshift closet in the back of the building facing the alley, with an unlocked sliding door in front.
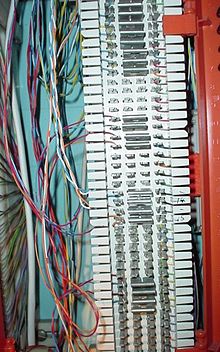
If you look at the "phone closet" you should see something sort of like this:
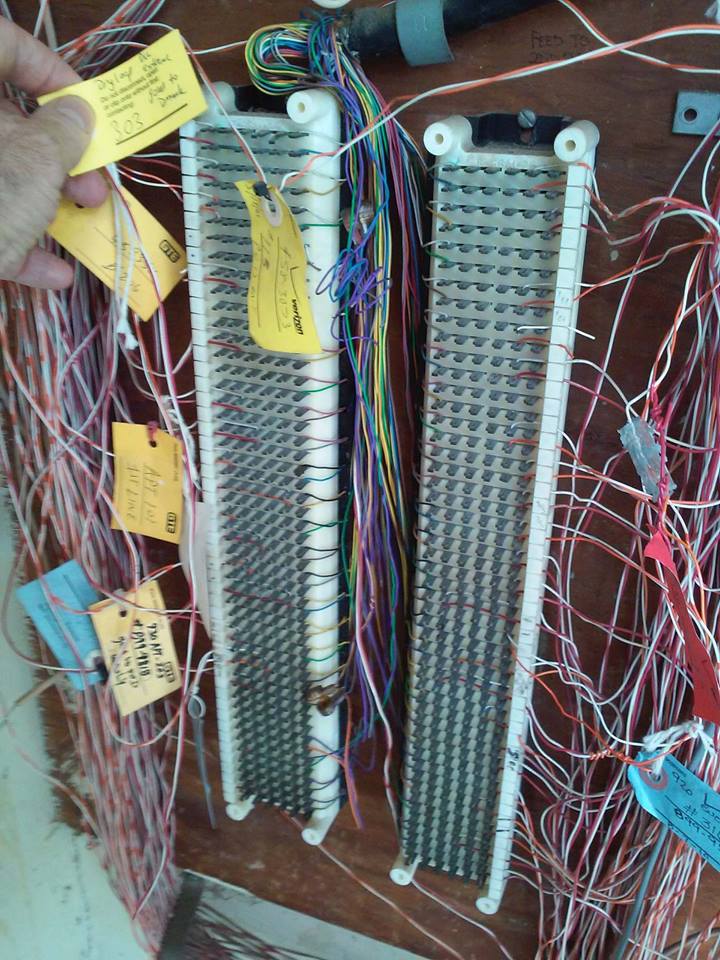
We see here a massive spiders nest of colored cables and two "66 blocks" which are terminal block things where the wires are tied down.
This looks like an incomprehensible mess. Often it's so confusing that people just want to give up. But it's really not that bad.
Find the DSL Line
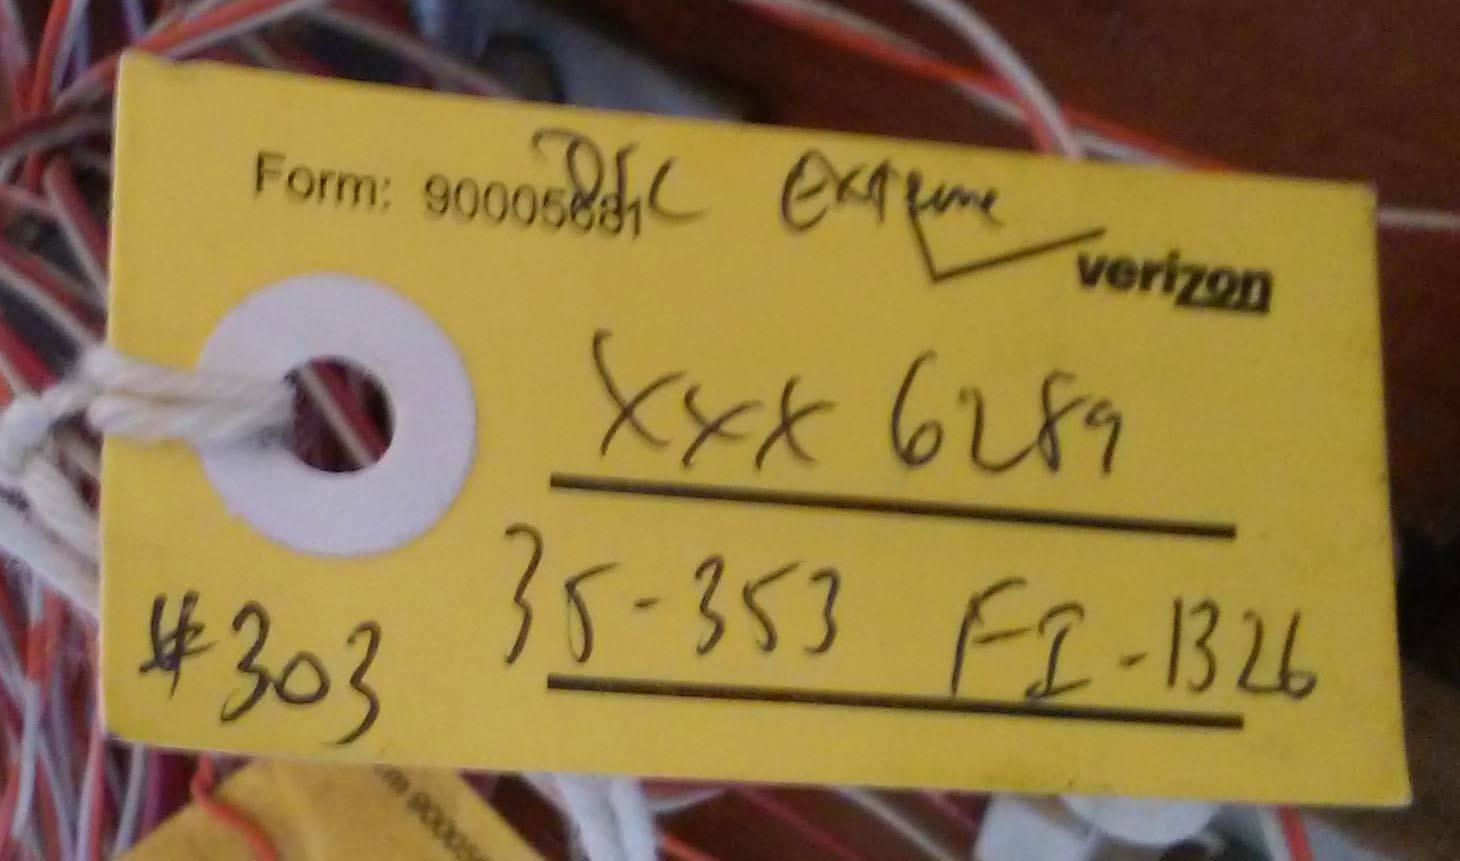
Every DSL line has a phone number. If there is no voice service, we call this a "dummy number". This number will be written on a little yellow tag from Verizon.
Here's a typical tag from a DSL that Verizon has installed for us. Note the telephone number should match our dummy number.
Here's the reverse side of the same tag. The Verizon installer was nice enough to add a few notes. He has indicated the apartment number (303) but he has not actually connected it to that apartment, that's just where it is SUPPOSED to be connected.
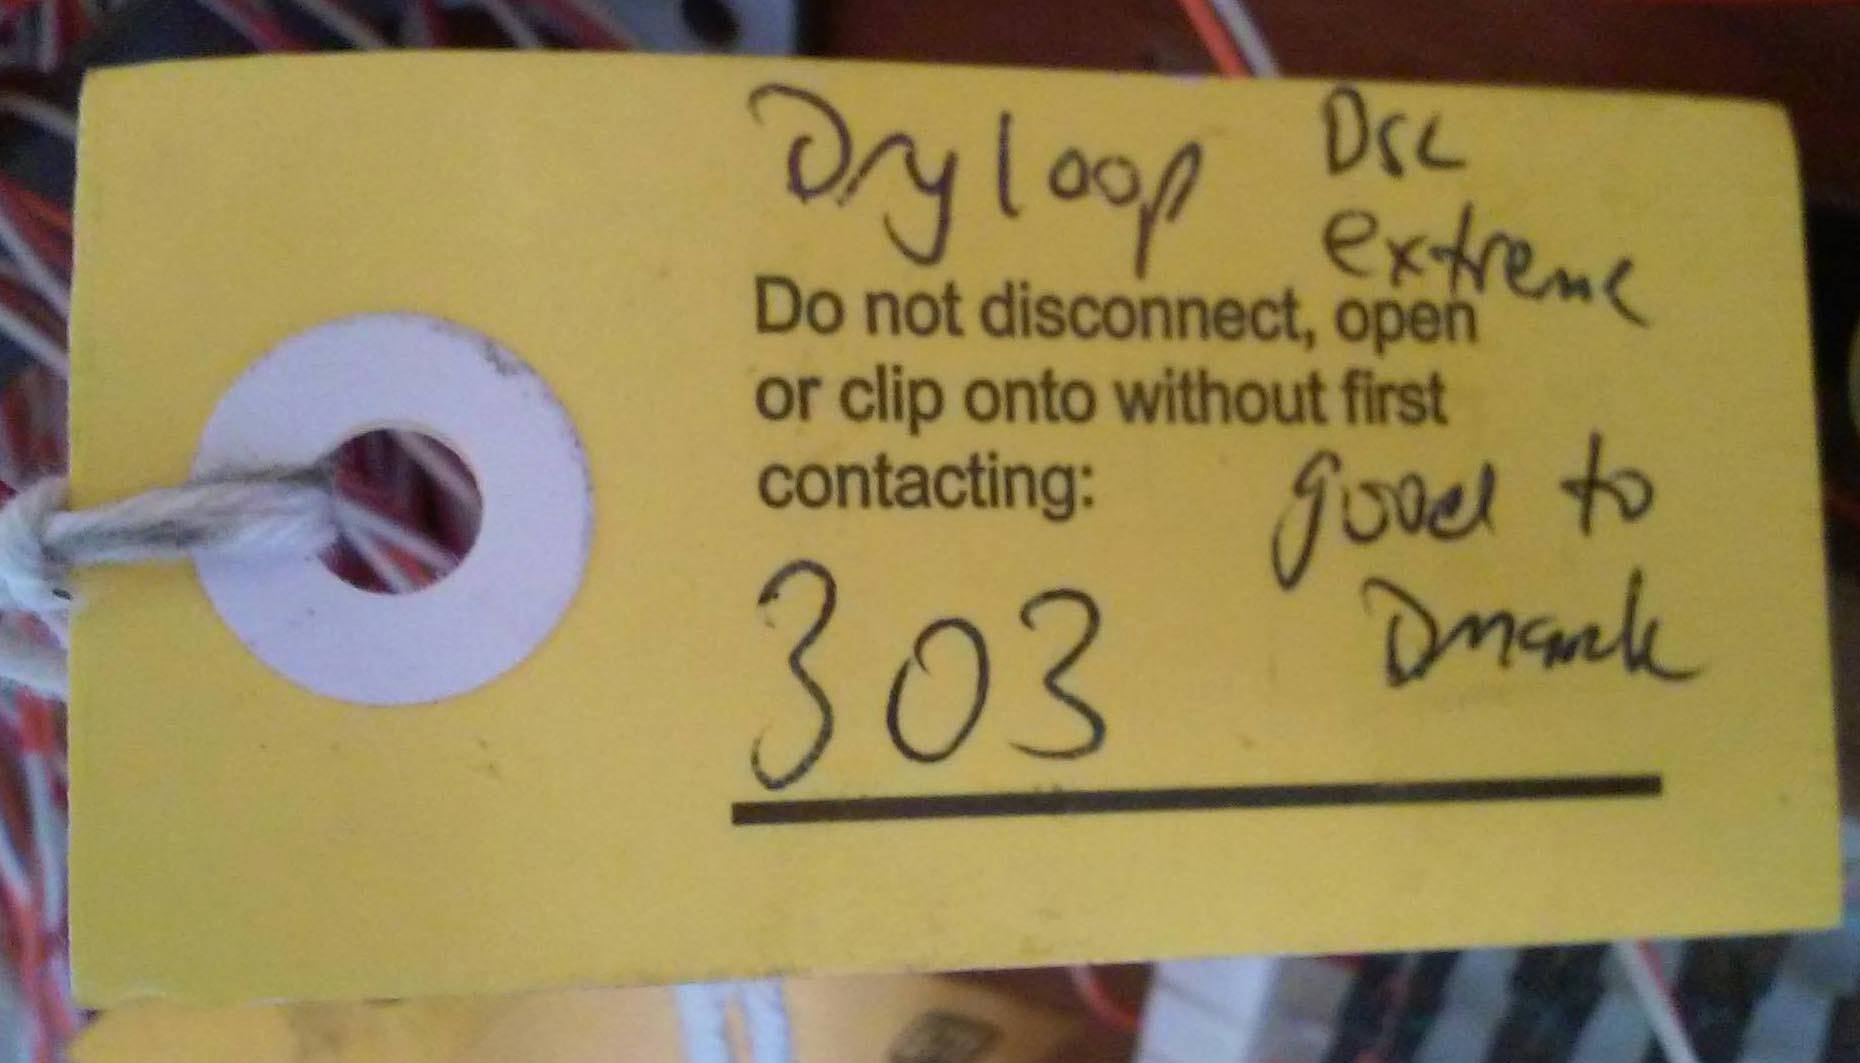
If you find this tag, you have found the DSL. You are ready to go to the next step.
If you do not find this tag, then look around a little more. Are you sure you are in the right phone closet? Some buildings have more than one. Are you sure the installation is ready? Are you sure you are looking for the right dummy phone number?
Sometimes Verizon gets lazy and doesn't tag the lines. If that happens we have to ask them to come out again and tag the line.
If you need us to ask Verizon to come out and tag the line, we will be happy to do so. It takes a couple of days unfortunately, but we can ask them to do it.
Have you found the DSL line? Great. Let's go to the apartment and find the jack wires.
Find the Apartment Wire to the Jack
Our next goal will be to find the wires to the apartment.
We will start in the apartment, at the jack.
To do this we need a wire tracing tool. There are many brandx of these - the one I use is called a "Fluke Tone Probe". Fluke used to manufacture in Seattle but these days like everything else they are made in China. Here's what the tool looks like:
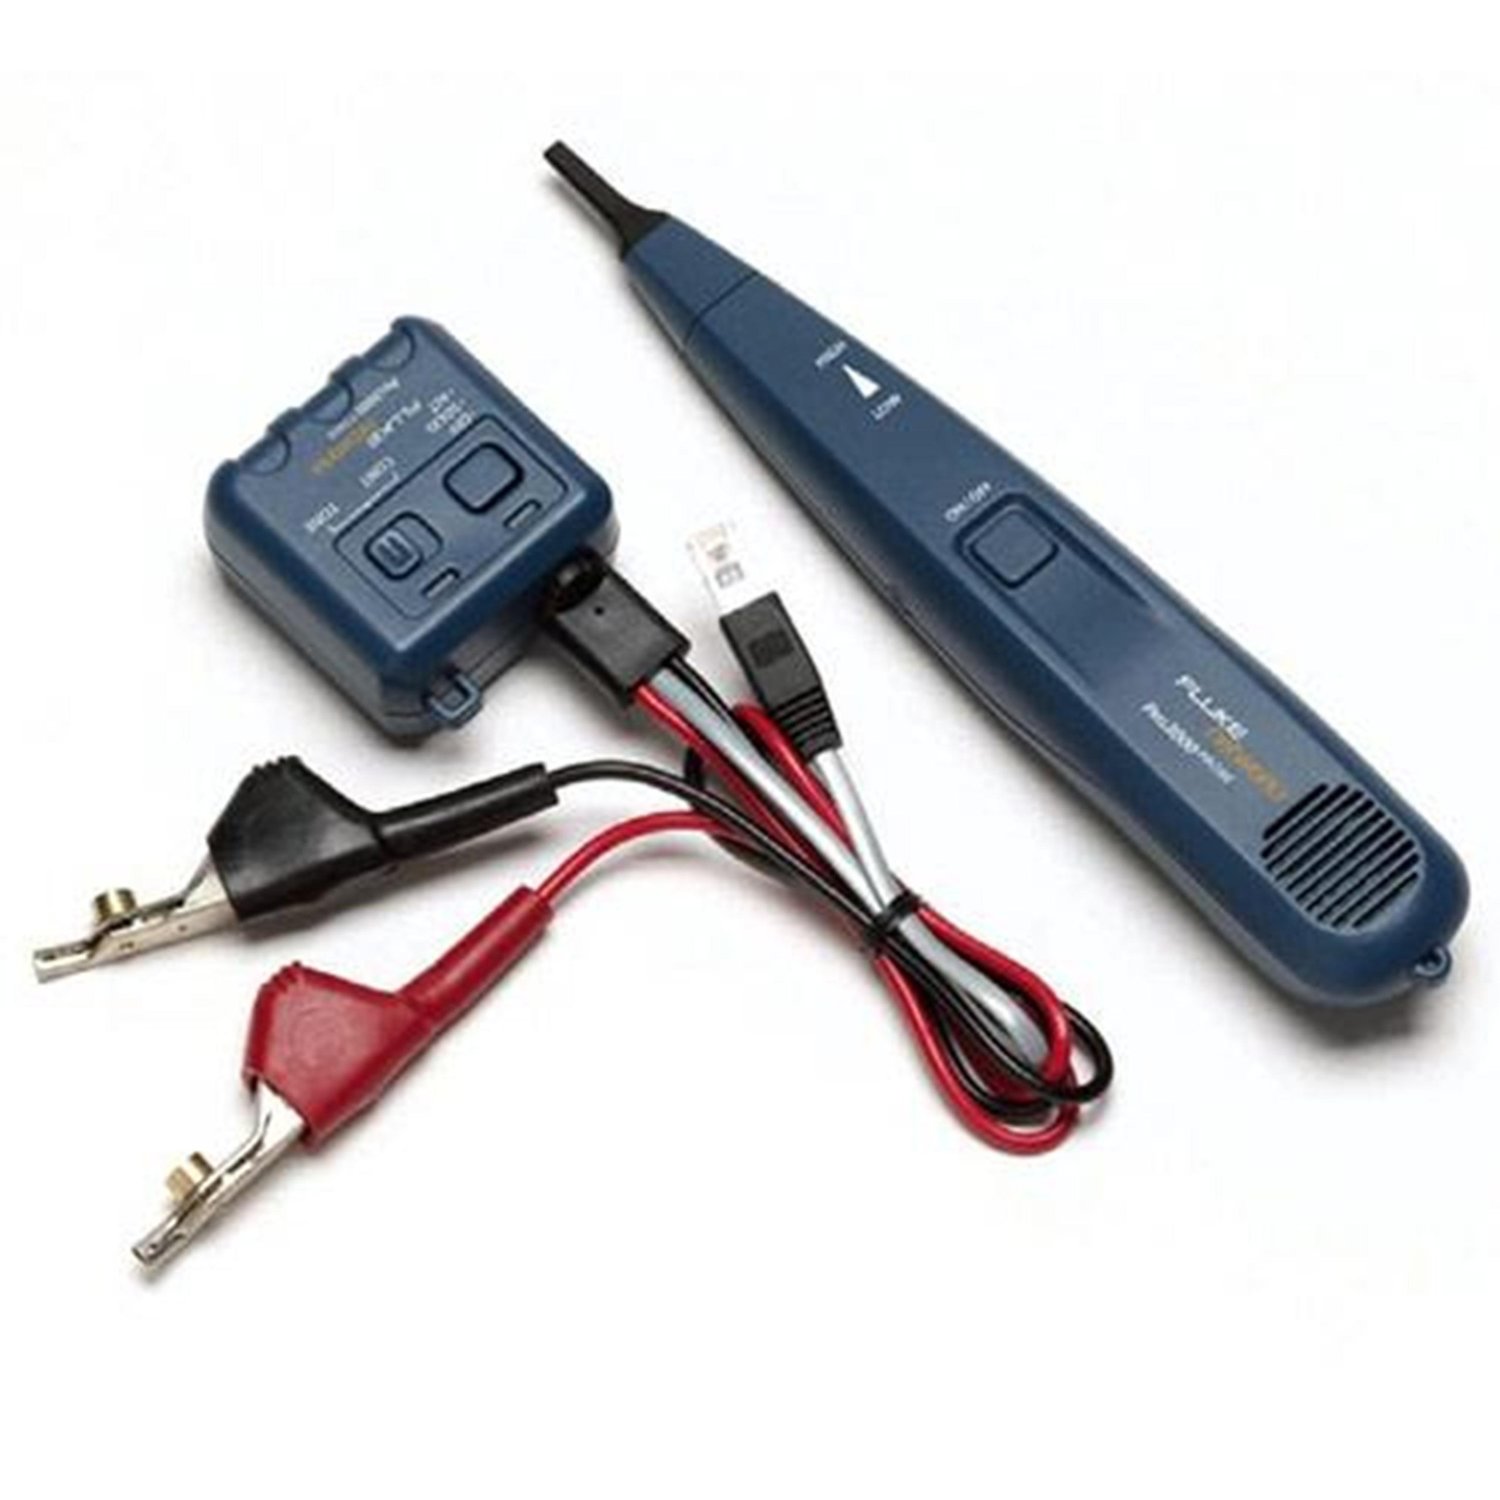
There are two pieces to the tool, what I call the "Noisemaker" or "Signal Generator" - a small box with some cables, and the "Detector", which looks like a big oversized electronic screwdriver.
In the apartment
Take the noisemaker (tone generator) and plug the telephone connector cable into the telephone jack.
If you need to trace wires that aren't connected to a jack, you an also use the clip leads to connect to bare wires and trace them, but hopefully you won't need to be doing this.
Do not start at the phone closet to trace wires. They might go anywhere. This is too difficult. Start at the jack.
Turn on the noisemaker by pressing the little button on the front. The led should start flashing. Press once for solid tone, once more for blinking tone, and once more to turn it back off. Then attache the noisemaker to the jack.
Test the probe (detector) by brushing it against a wire you know to be connected to the noisemaker. If you have it on pules mode and on, then it will go "woo woo woo woo" when it detects the signal. It can do this from a few inches away but it gets louder as it closer. This can be used to detect wires in walls in some cases, but that's not how we are going to use it.
If the probe doesn't work, make sure you are pressing the "on" button on the side of the probe when you test. If that doesn't work, you may need to check batteries.
Now, once you have got the noisemaker connected, and you have tested the probe, you are ready to go to the telephone room.
In the Phone Room
Take the probe, and pressing the "on" switch on the side of the probe, touch wires one by one. When you find the right wires you will get the "woo-woo-woo-woo" sound just the same as you did when you tested the probe in the apartment. Bingo, you have found the wires you are looking for.
Remember, there are two wires, and you need to find both of them.
Once you have found the wires, it would be nice to label them with some tape and a pen, if such things are available.
Cross Connect the Wires
We have found the wires. We have two wires from the telco, and two wires from the customer.
If we were really lazy, we could just twist the wires together and the dsl would probably work.
But twisting wires together is lame. Unprofessional. And they might come apart.
The way we connect the wires is by punching them down on a 66 block. Let's go over this in a little detail.
What is a 66 block?
The 66 block is a wall mounted device for connecting telephone wires, as shown in the photo below.
Wikipedia has an article: Punch down block.
Telephone lines from an apartment are really confusing and usually are a mess, but they should all come out in the phone closet and are usually tied down on a "66 block".

In this type of 66 block, everything in one row is connected together. So, to cross connect two wires you just punch them down on the same row and then they will be connected. It's usually safest to punch them to two horizontally adjacent connectors. You can jiggle the connector with your finger to see how they are connected together.
Sometimes each row in the block two sets of connectors with jumpers that can be added or removed in the middle. So, without a jumperleft side and right side are not connected. With a jumper, the whole row is connected. That looks like this:
How do you know which one you have?
Try jiggling a row of pins on the block with your finger. If it's all one piece of stamped metal, then you have one type, if it feels like the right side and left side are separate pieces of metal, then you have the other type, with the jumpers.
Either way, keep this in mind when you are doing cross connections.
Punch Down Tool
The punch down block is designed to make cross connecting wires easy and painless. The tool looks like a little screwdriver, but it has a sort of a sharp end that can push wires on the the connector pins, and cut off the spare ends.
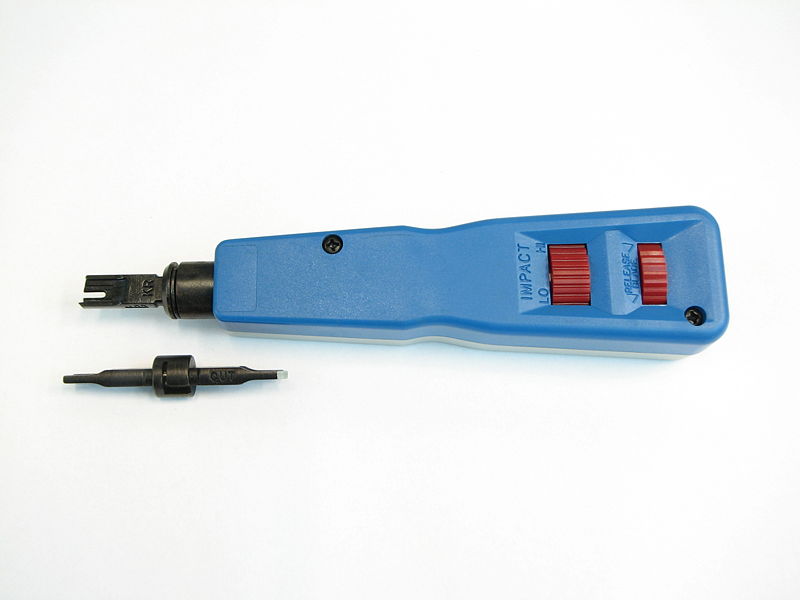
Examine the punch down tool. The end of the tool looks like a tiny, "U"-shaped fork. On one side of the fork is a sharp blade that will slice off the extra wire after it is pushed into the connector. Make sure the blade is over the top of the extra wire that needs to be cut off, toward the outside edge of the phone block.
Push down on the punch down tool to push the wire into the metal fork. The tool will smoothly push the wire into the fork, establishing the electrical connection. At the end of the stroke, the tool snips off the extra wire, leaving a clean connection in the phone block.
Read more : http://www.ehow.com/how_5113846_use-punch-down-tool.html
Punchdown with a Screwdriver
If it seems too difficult to use a punch down tool, you can also punch down wires with a screwdriver. Just push the wire onto the clip and push it all the way down. Note that it is NOT required to strip the wire. The clip will cut through the wire's insulating cover and it will make a good connection as long as you push it on tight.
The special punch down tool will trim off the excess so in general cross connections done with the tool look nicer than cross connects done with a screwdriver, but either one works.
Which Pins?
Sometimes it is confusing to know what wires to which pins on the block.
Usually we leave the apartment wires alone and move the telco wires.
Usually we put the wires we want to cross connect, next to each other. For example, the red and blue arrows in the diagram look like wires that are cross connected.
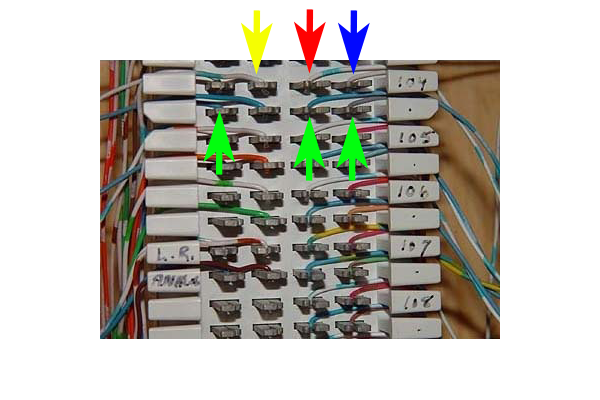
The red and blue wires arrows point to pins that connect to each other through the block. You can verify this by jiggling the blue pin, and you will see that it is the same piece of metal as the red pin.
The red and blue pins may also connect to the yellow pin. This depends on whether the whole row is one big piece of metal, or two pieces. Jiggle it with your finger and it should be pretty obvious. If red blue and yellow all move together when you touch them then they are connected.
The green pins do not connect to the red, blue or yellow pins, because they are in a totally different row. Rows do not connect.
If my house wire comes in on the red pin, then I would put the dsl line on blue. This is how you do the cross connect.
Remember there are two wires in a phone line so there are two wires to cross-connect. Polarity does not matter but obviously if you tie the two phone lines to each other that's not going to work.
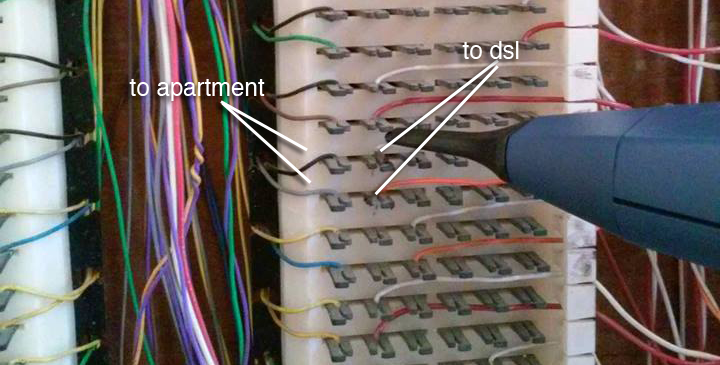
Successful Cross Connection
Here's a picture of a successful installation. We located the orange and white DSL line by finding the Verizon tag. The black and white wires we found by tracing from a wall jack in the apartment. We moved the white and orange wires on the right side to connect to the black and grey wires on the left side, which go up to the apartment and connect to a phone jack. So now the phone jack connects to the dsl line. The probe tip is touching a white dsl wire.