Divs are container objects used on HTML layouts. A Div is basically an empty box. In order for a div to be visible or useful you have to define some properties. This is usually done with CSS rules.
Dreamweaver makes extensive use of Divs. Most of the time when you set a property, such as a font color, Dreamweaver will place the text in a div, and then create a css rule to set the color. You can actually build your websites using HTML without Divs, but some people feel Div and CSS is the best way to do web pages. It's a personal choice.
You may find it useful to read the W3schools page about div tags: http://www.w3schools.com/tags/tag_div.asp
Create a new project. For class we are going to call this "Project 2" and nest it in your class folder so that it is a subfolder of the main folder.
If you need help creating a project and folder, there is a tutorial on this subject.
Now, create a new page in this project called "index.html". You don't need any style or template for the page, just make it a basic html page.
In the center of your empty page, insert a div in the page by selecting from the menu:
insert > layout objects > div tag
Here is what a div tag looks like (you should see this on your screen):
Note that it has text but you can't see the actual div. The text can be replaced with your own contents. Here is the html that was created:
<div>Content for New Div Tag Goes Here</div>
Let's modify this so that the div has some color and can be seen. We are going to create a stylesheet and a rule.
From the menu select format -> css styles -> new, or choose the "new CSS" rule icon, which looks like a sheet of paper with a plus sign on it, in the CSS Properties panel.
Dreamweaver will want to save the CSS rule in a CSS file. Save the fileas "mylayout.css".
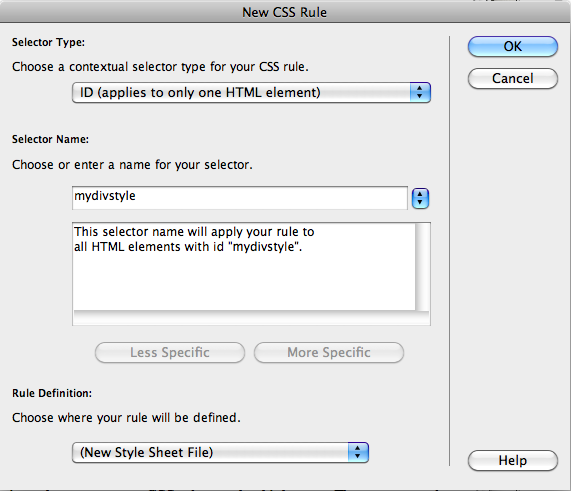
Now for the rule. Set the options as follows:

Note: in CS3 you must start the name of the "selector" with a pounds sign (#). So enter #mydivstyle in the box pictured above. These pictures are taken from CS4 which does not require this.
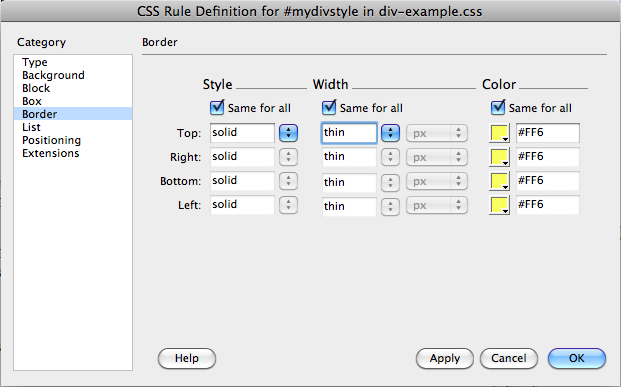
When you hit enter, the program will then ask you to choose the options for your new CSS rule. We want to make our Div easy to see so lets add a visible black boundary line and let's make the boundary of the Div yellow.
Great.
Now, let's apply that rule to our DIV to give it a yellow boundary.
I'm actually just going to use the menu to insert a new Div based on the CSS rule.
Delete the old Div, and then replace it. Select "Insert -> Div Tag" and make it look like this:
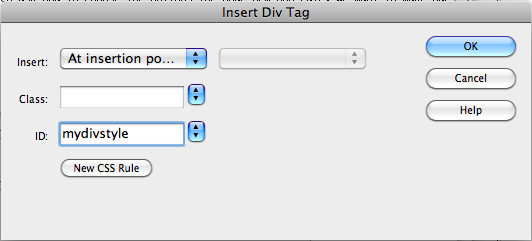
This creates the following:
Here's what the html looks like:
<div id="mydivstyle">Content for id "mydivstyle" Goes Here</div>
Note also that there is an a entry linking this page to the CSS file. This is contained up in the header and looks like this:
<link href="div-example.css" rel="stylesheet" type="text/css" />
Excellent. So now we know how to make a Div, and a matching CSS rule. Uusually when using then with Dreamweaver you will create the Div and Css items in pairs, one css rule to go with each Div. One CSS rule can set several HTML settings, such as color, font, background color, etc. The rule will apply to everything in the Div.
Alternatively we could have done this by typing. In the header type the commands to link up the style sheet, then in the body area, find the div and add the name id="mydivstyle". If you know the correct commands this is probably faster than using the mouse to chase through the menus. You get the same final results either way.
We are eventually going to be using Divs for a page layout.
You can imagine how something like this would work. You create one big div for the whole page, and smaller divs nested in each other for the various areas of the page.
There is a good example of how to do this in Chapter 7 in the book.
We will go ahead and create an example here which is a bit similar.
We are going to create an outline for a page similar to the one we did with the table layout, but we'll do it with Divs.
There will be a header, a footer, a content area, and a menu on the left side.
This means we will need to crate five divs.
Let's plan our sizes. We will make the page 600 pixels wide. The header and footer will be 100 pixels high. The menu will be 200 pixels wide and the same height as the content area. The content area will be 300 pixels high and as wide as needed to give the proper page width of 600 which means it will be 300 x 400.
We need to create 5 css rules, as listed below
We will call our page index.html (create a new page with this name in your new project) and our css file will be created with the name project1.css.
That's our plan. Let's give it a try.
Create the new page (file -> new and use no templates).
Create a new css rule: Format -> CSS styles -> New
Set the options as follows:
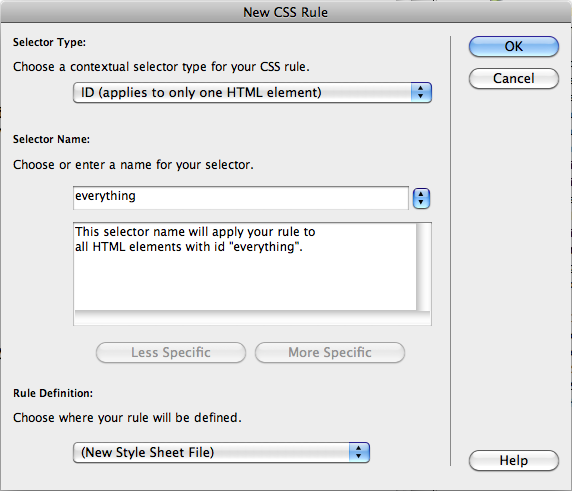
We have set the type=id, name=everything, and where=new style sheet.
Then save the css file as "project1.css".
Next we create the actual rule:
Set box->Width -> 600
Background -> Background Color -> choose yellow from the color palette
The second one looks like this:
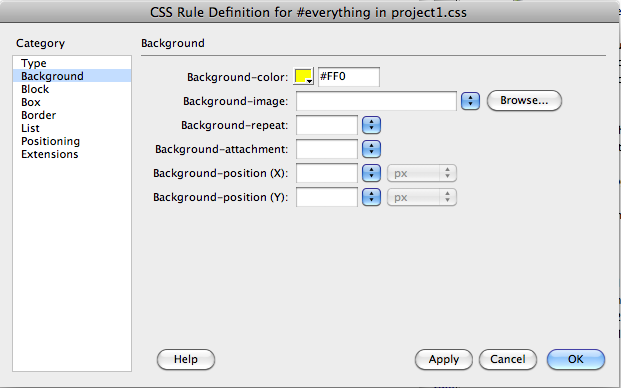
To create additional rules, you select a category at left, and a detail item on right. We've set yellow background.
Follow the same procedure to create the other four areas. Note that alignment is set under box-> float in the CSS rule options. You will need to set this for the menu and content areas.
So go ahead and set up those other rules. I'm not going to give all the details, it's pretty easy. Each of these rules should be added to the existing css file. So we will end up with five rules in our CSS file.
Next we're going to check that we have created the right CSS rules. It's easy to get mixed up and leave something out, so a little time spent checking our work is worth the time.
First, let's check the CSS panel and see that we have the right rules.
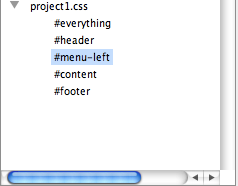
We have selected #menu-left, and the properties are shown below.
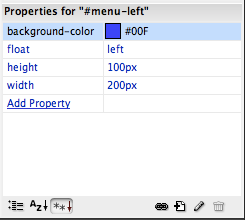
Go through each of the items and make sure that it is set correctly. If not, you can click on them and change them.
Next, let's have a look at the css file itself. Locate it in the file list, where all the html files are located, and double click on it. I called mine "project1.css".
You can inspect each of the options to make sure they are correct according to our plan for the web page outline.
#everything {
	background-color: #FF0;
	width: 600px;
}
#header {
	background-color: #00F;
	height: 100px;
	width: 600px;
}
#menu-left {
	background-color: #C63;
	height: 100px;
	width: 200px;
	float: left;
}
#content{
	background-color: #999;
	height: 300px;
	width: 400px;
	float: right;
}
#footer {
	background-color: #C0C;
	height: 100px;
	width: 600px;
	float: left;
}
If you see any errors, you can fix them here. Just type your changes and then save.
Excellent. We have our five rules created. Next we are going to build the page using these rules.
From the menu select Insert -> Layout Objects -> Div Tag, set insert="At insertion point" and ID="everything". This will select the first rule we made.
Note: in CS3 you should start the ID with a pound sign (#). So enter ID = "#everything". CS4, which I am using, doesn't seem to require this.

Your file should now look something like this:
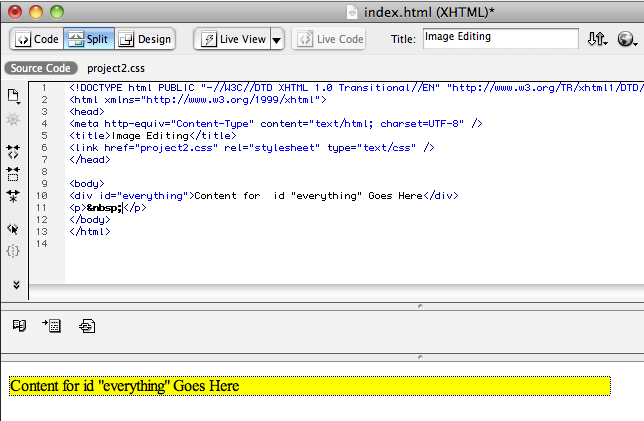
Note that Dreamweaver has inserted some dummy text in the div, and it is yellow, as we specified in our rule.
Now click just before the "C" in "Content" and insert the header tag css. The procedure is pretty similar, you should be able to figure it out. If things go wrong hit ctrl-z to undo and try again.
Here's what the page should look like if that works:

Next place the customer in the same place again, right before the "C" in the yellow "everything" area. Insert the "left-menu" css div. Now your page should look like this:

Repeat the process to add the CSS/Div areas for Content, and Footer. The final result should look something like this:

If you got this, great.
This layout will look nicer if we add some space around the text so that it is separated from the walls. There are some options for this:
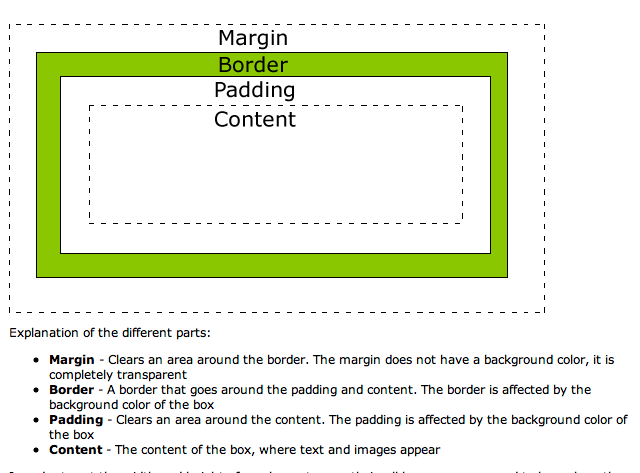
You can adjust these options by adjusting your CSS rules through Dreamweaver.
This is how we make a layout. The next step is to put some content in the different areas we have created. I made them different colors so you can see where the various DIVs are. There is also some sample text that is created by Dreamweaver. You can delete this.
Notice that the menu area is short, you can make it longer if you want. It will expand if you put some text in it, so it should be OK.
You may ask, how did we control where the various items were displayed?
If we had inserted the div's in order, and didn't nest them, and didn't align them, then they would have looked like this:
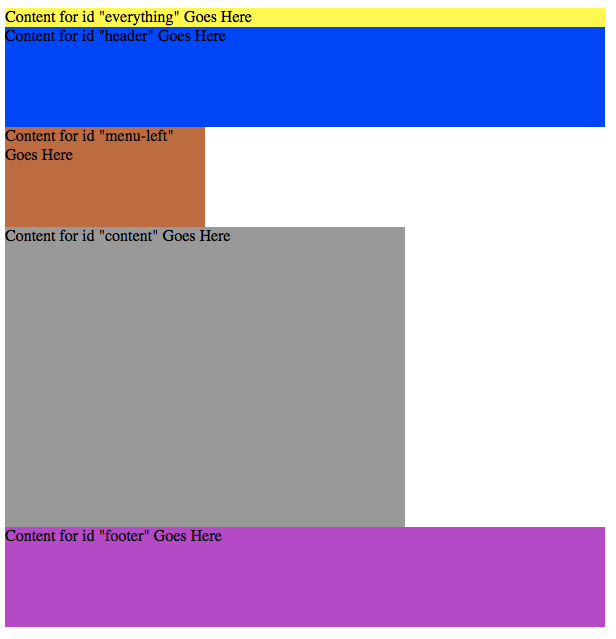
We set a page width for the page, and made the content and menu areas stick to the walls with align commands. The other areas just flowed to the next line for each object because they had reached the edge of the page.
We used the align left and align right rules to place the content and menu areas to right and left.
Based on the width of the various div elements, and the width of the everything area, various elements are forced to go to the next line. That's pretty much it.
If you were to insert a really large image in one of the DIV's it could disrupt the layout. For example a 700x700 image in the menu area would cause the content area to roll over to the next line. This is something to be aware of. With table layouts, if one of the cells gets larger, it makes the whole table larger, but the order stays the same. With Div's, if you change the size, the results may be a bit odd as the computer tries its best to fit everything on screen.
Your assignment is to do the project in Chapter 7 in the book. This walks you through a more detailed page layout. If you have understood this tutorial, then that one should be fairly easy.