This is a tutorial aimed at those who really don't know how to use Photoshop. Photoshop is the best way to resize and crop images for your website. There are other ways, but if you have access to photoshop, that's going to work the best.
There are several commands in Photoshop to change the size of images. Before we start, let's review what each of these commands does. Each one is found in the images menu.
Draw a selection rectangle on your image, then select Image -> Crop. The area outside will be cropped (cut) and thrown away. The size of the image will now be the rectangle you originally selected. The details of the image will not change. It will not zoom in or out. It will simply discard the area outside your selection.
The rectangle selection tool is found in the tools menu, and looks like a dotted line rectangle.
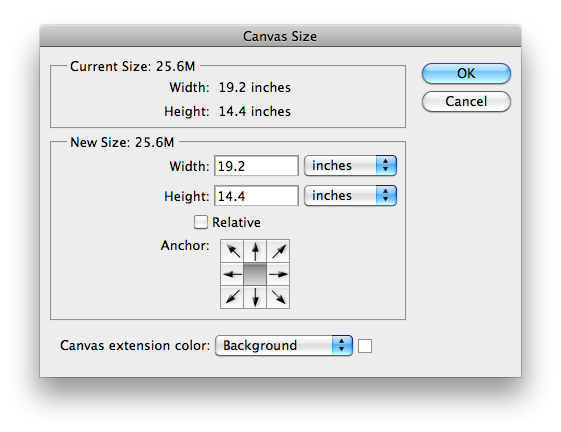
This is similar to Crop, but it's done by entering value in a dialog box, instead of drawing a rectangle.
Select Image -> Canvas Size. The following dialog will come up:

Enter the desired size. I would change units to pixels first.
Then, where it says "Anchor" there is a little tic-tac-toe board shape with little arrows on it. This is where you set the expansion point. If you select center (as is done here) then the canvas size will expand or contract around the center of the image. If you select upper left, then the expansion/contraction will be around the upper left, and the lower left will be discarded. If you choose upper center, the expansion or contract will be around the upper center, and the lower part will be discarded. If you try this a few times you will see what I mean.
This will stretch the image to a specific. Note that the image will be stretched, not cut, so it's totally different from what "Crop" and "Canvas Size" do.
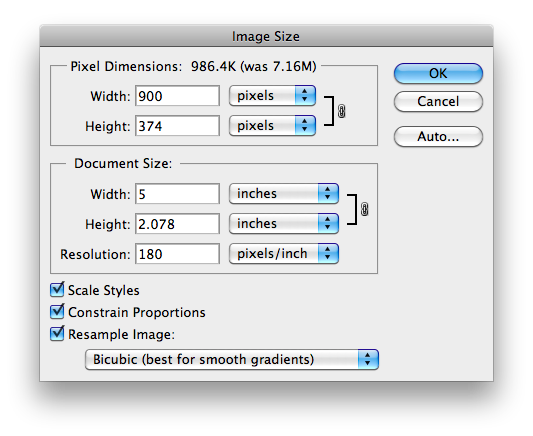
From the menu select Image -> Image Size. The following dialog will come up:
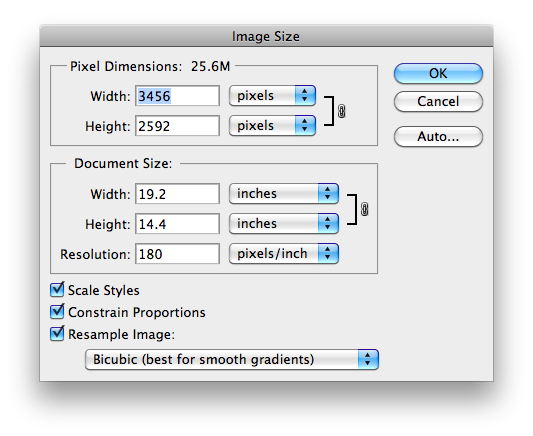
Enter the desired size. I would change units to pixels first.
You can ignore the "Document Size" which simply describes how big you want this image to print. We're not printing. We are only interested in pixel size, because that's what is used in HTML.
The little chain symbol means that this image will be resized at a constant aspect ratio (height to width ratio). If you unclick this, you can distort the image, but in web design we usually don't want to do this.
I have a picture of some flamingos in a lake, that I want to crop and resize to make a banner 100 pixels high by 900 wide. Here's the original image. It's way too big, more than 3000 x 2000 pixels, so we are going to have to both crop and resize it.
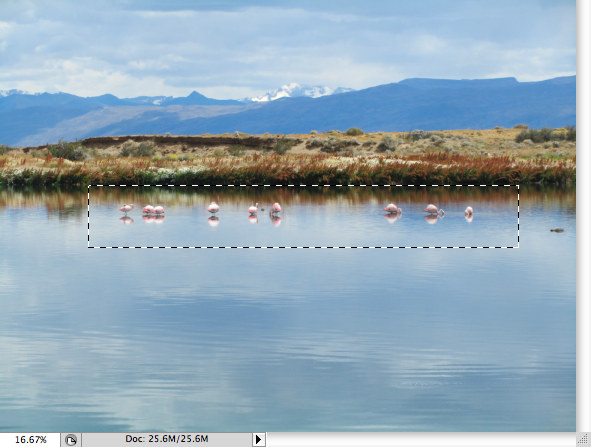
I've drawn a little rectangle with the selection tool to show the area that I am interested in.
I will do this as a three stage process.
First I'm going to make a rough crop. I'm going to use the rectangle tool to choose the area I want to use for my banner. I will pay very close attention to the upper and side boundaries, and I will make sure that the bottom boundary is too big. We will set that later.
Why are we doing it this way? Well, it's really hard to select things with the mouse, and get a precise heigh. So we will select the general area and then trim it using typed sizes.
Here's my selection area. Note that it is a little bigger than the previous selection.
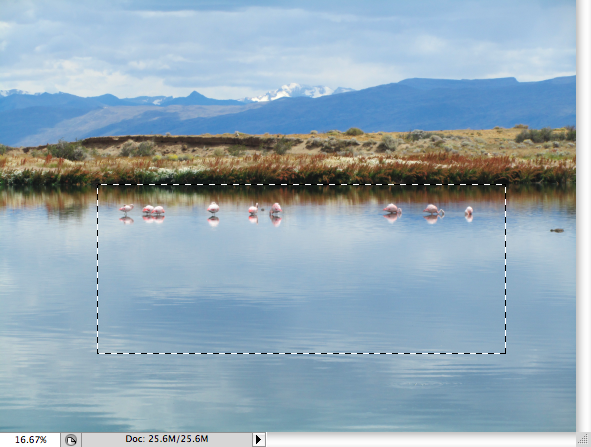
This looks fine. From the menu select Image -> Crop and everything outside the rectangular selection area will be discarded. Here's the final result.
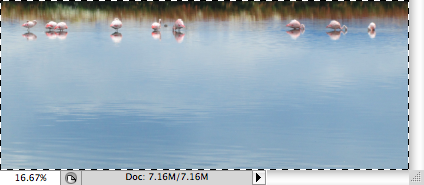
Next we will use Image Size to set the width to the correct width. From the menu choose image -> size and set the width to the number of pixels you want, and let it resize the image. I want this to be 900 pixels, so I enter that for the width.
Here's the final result. Note that the zoom level is different. Now we are viewing at 100% size.
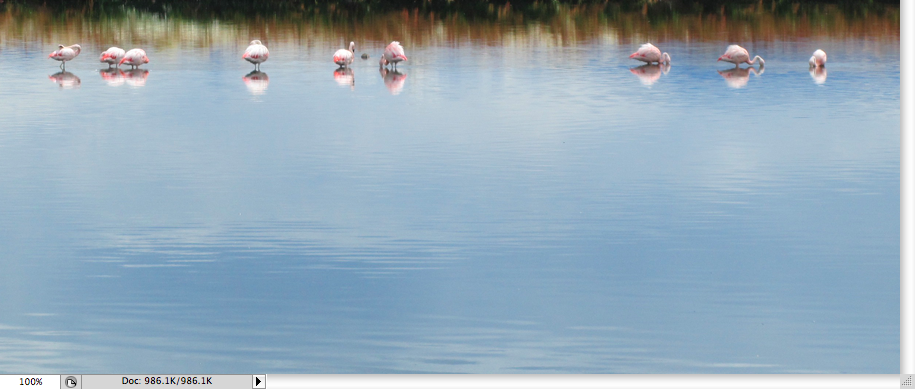
At the point the image is the right width, and has the correct top edge, but it's too tall. So we need to discard the bottom.
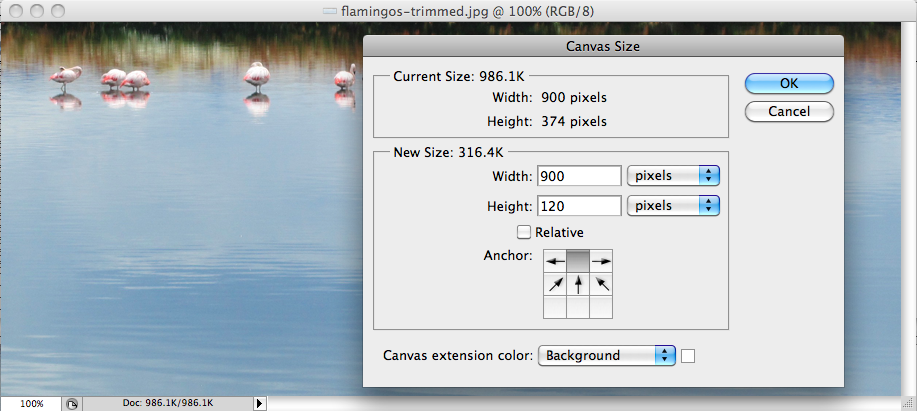
Use Image -> Canvas Size to set the height of the image.
To do this, select "canvas size" from the menu, then where it brings up the dialog box, type in the HEIGHT that you want. The width is already set. You also need to select the expansion point. This is the kind of tic-tac-toe board thing. Select the upper middle as the expansion point.
Here's what that dialog looks like:
And here is the final result.

There are a number of tricks you can use to get images exactly the right size. It's important to understand the difference between "Image Size" and "Canvas Size". Most of the time we will need to use both to get the exact size and zoom level that we want for our final image.
Another strategy would be to center the manual selection area, instead of trying to draw the top boundary. Then, when we go to the step where we adjust the canvas size, we would center the expansion area instead of expanding around the top.
Good luck!