We are using the book "Classroom in a Book" from Adobe for our class. It has tutorials on how to use the Dreamweaver program. These notes will help you complete those assignments.
It is a prerequisite to take this class to understand basic use of your computer, so I'm not going to explain in detail simple things like how to create a folder. If you are really uncomfortable with these things I'd suggest that you quickly transfer to the Beginning Internet class, we cover a lot there and that may be a better way to go, then come back next quarter and do web design. With that in mind...
Create a folder on your desktop with your name on it. I'm going to call this "jimpickrell_caot112". You can create a folder using the right click on the desktop. Make sure the name identifies you. Do not put my name on your files.
There is a CD that goes with the book. Copy the contents to the folder you made in your desktop. Do you really need the CD? No, not really. You can create the graphics and so on yourself. But it will be nice to use their folder structure so everyone is doing more or less the same thing. I am going to assume that you have the CD.
When you are done working for the day, you will want to copy your entire site from the desktop to your USB drive. Note: drag and drop won't copy the files, it just makes a link. You should copy and paste the files and double check to make sure they really copied.
When you come in again on another day, you will want to copy your entire site from your USB thumb drive to the computer desktop.
Hilight the folder of files you want to copy. For example, if you are copying the lessons from the cd, then go to the cd, and hilight the "lessons" folder.
Now type control-c (command-c on the Mac). This copies. As an alternate you can right-click and then choose copy from the menu. This does the same thing.
Now go to the destination. In our example, we are copying the lessons to the computer desktop. So, go to the desktop, and paste. On windows, that's control-v, on mac, command-v. As an alternate you can right click and choose paste from the menu that comes up.
Watch as the files copy. The system will count them as they are copied. If you don't see this happening, then you may have done something wrong, so check.
This lesson is contained in folder /lessons/lesson01. For me this will become desktop/jimpickrell_caot112/lessons/lesson01, right? There will be subfolders for images etc. See p.88 in the book for a picture showing file structure.
This lesson will teach you the following things: create a file, save a file, change title of the page, inserting pictures and text, links, and css styles.
It's nice that they have examples with pictures, but they seem to have left out a bit of the explanations. As you type things up look at the html that Dreamweaver creates and try to understand what is going on. For example, when you create a title (page 10) Dreamweaver will create a "title" tag in the header section of your html page. Have a look at the html and find it. Don't be afraid of this stuff, you really need to know and understand how this works. You can learn a lot by reading the html.
The book completely glosses over the discussion of CSS. For now here is a short explanation.
You can create a "Style Sheet" which will allow you to redefine some of the html tags, and create new tags. This is an advanced html feature and it's quite confusing, so you will need to allocate some time to learning CSS.
A css file is a text tile with a list of formatting commands and what you want them to do. For example, you can redefine the "h1" tag to make the h1 headers bigger, or blue, or use the courier font. If you use a css file with your web page, it means you have two files that you need to upload, one with the name *.html and one with the name *.css. Multiple web pages can use the same css file. So often we will make a single css file that defines the styles for all of the pages in a single site.
There is a very good writeup about CSS on the W3 schools website: http://www.w3schools.com/css/default.asp. It is worth taking the time to go through this tutorial step by step, in fact, I will require this later on.
At the end of this tutorial, you will have a page with text and colors and picture, and probably won't have any idea how you did this stuff. That's fine as long as you get to the end of the tutorial.
Lesson 1 Walkthrough
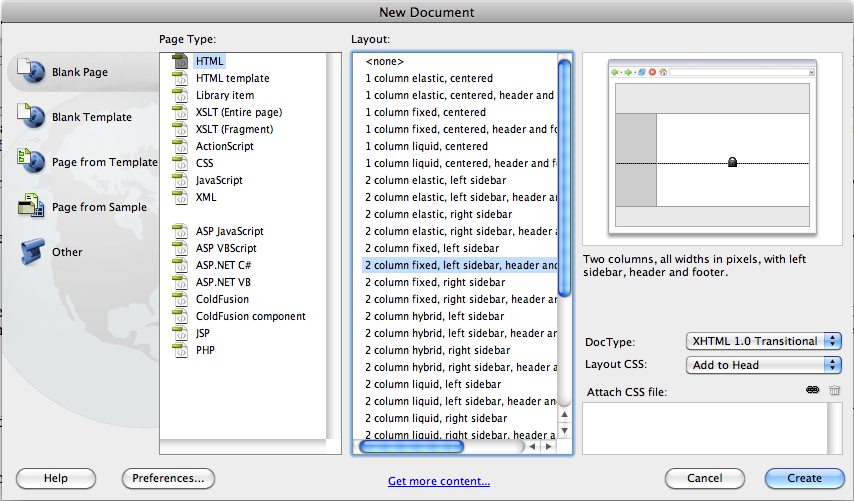
In this lesson you will create a page with a title, some text and a picture. We are going to use a canned template to layour the page. Create a new page file -> new. A menu will come up with the new document options. Select blankpage in the fist column, html in the second column, and " 2 column fixed left sidebar, header and footer" in the third column. In the 4th column you will see a picture of the template. Here's what it will look like (see page 9 in the book):
Click "create" and you will have a new file.
Save the file: file -> save. We will call the file "index.html". Make sure you are saving to the right area, which is the lesson1 folder. There are already some files there from the CD. (You copied the lessons folder from CD to the desktop right?)
Modifying the Page Title
The "title" of the page is the heading at the top of the window when you view your web page. If you don't set the title then the default title is "Untitled Document".
Select "split screen" in the document window.
![]()
You will see html on the top and our (blank) web page in the bottom half of the document window. Now locate the title box and type in a new title.
![]()
Replace "untitled document" with "Vacation Palace". Refer to page 10. Now have a look at the html part of the document page and you will see that the "title" take has been modified. You may have to scroll up to the top of the html in order to see this.

Next we are going to replace some of the boiler plate text in the template page we have created. You can replace the text by hilighting it and then retyping it.
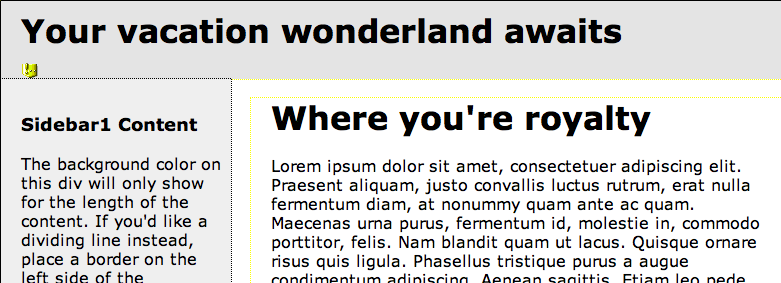
Replace "header" with "Your vacation wonderland waits" and replace the subheader "main content" with "Where you're royalty."
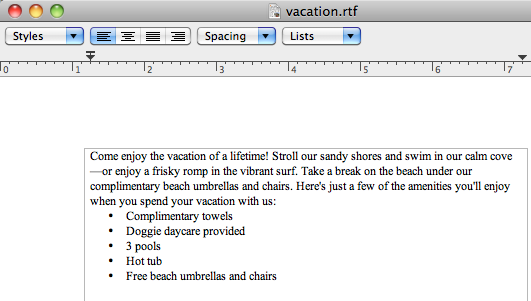
We are also going to replace some text. Right now the main content is just nonsense latin text: "lorem ipsum..." etc. etc. We could retype it but instead we are going to insert some text from a file. The classroom in a book folks have provided a text file, so go into the "lesson 1" area on the folder where you are working and look for the file "vacation.rtf".
Double click on the vacation.rtf file to open it.
Hilight all the text in the open "vacation.rtf" file to select it. Copy this text using "ctrl-c".
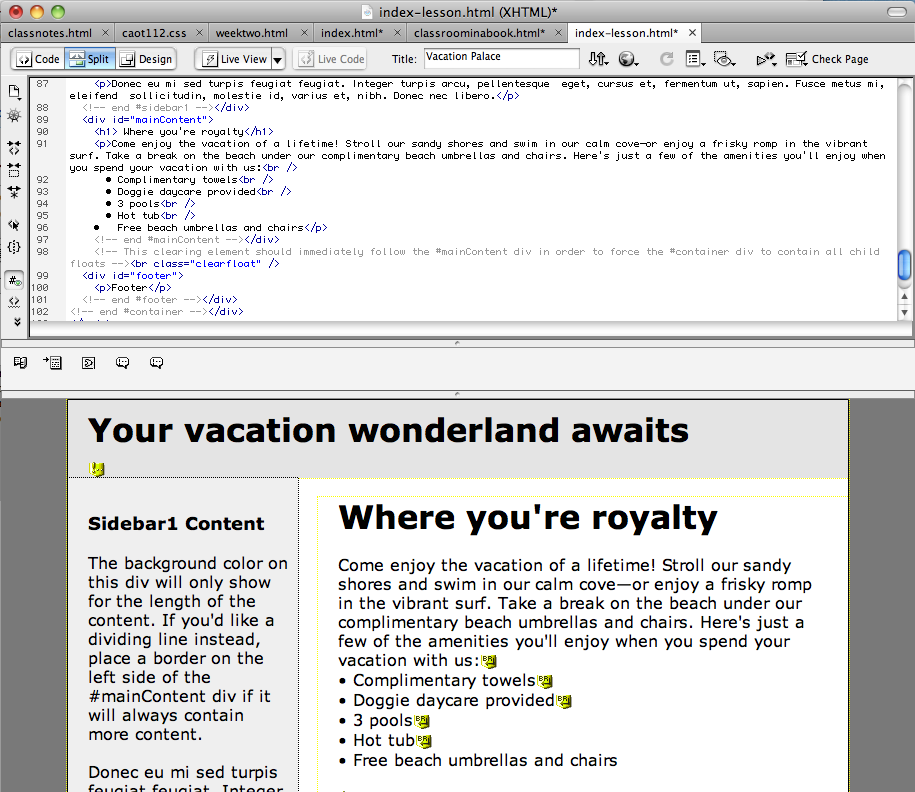
Now return to our web page and hilight the body text, from the line below "Where you're royalty" to the end of the nonsense text. Type "ctrl-v" to paste, and the text will be replaced.
If you somehow get the wrong thing, type "ctrl-z" to undo and then go back and try again.
Your web page should now look like the image on page 13 of the book:
Next we will insert a photo. To put it in the right place, hilight the text under "Sidebar1 Content". We are going to delete this. Insert a picture over it.
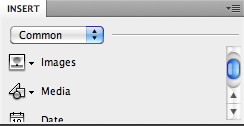
The easiest way to do this is to to the "Insert" menu and choose "Image". The book suggests to click "Images" from the "Insert Bar". If you have trouble finding the "Insert Bar" you may need to make the "insert" panel visible. From the menu choose window-> insert. Here's what it looks like (though you don't really need it because insert picture is in the menu already.)
So, select insert-> image and then select the image "lesson01/images/beach_birds_view.jpg".
Cleanup: the book recommends that you select the <h3> header tags and delete them too before you insert the photo. That's because when you deleted the text in the sidebar, you probably didn't get the header tags. There are two ways you can do this. You can edit the html, to remove the tags. Alternately you can delete it from the tag bar, which is at the bottom of the document screen. I find it hard to work with the tag bar, but it's up to you. If you have trouble type ctrl-z to back up and try again.
We are going to insert a second picture. Click to the left of the words "Stroll our" and insert the image "full_beach.jpg".
We need to adjust the position of the image. Select it, and now look down below at the properties bar.

Set the "align" property to "right". If you look at the html you will see that one of the options on the <img src > tag has been modified and will look like this now: <img src="full_beach.jpg" width="163" height="108" align="right" />
Can you see how the html tag has been modified to insert the align="right" option?
Next we will insert a link. Delete the text at the bottom of our page (see instructions page 14) and replace with the text "Information - Contact us". Now hilight this text. Go to the properties bar and type in a link: http://www.peachpit.com/about/contact_us/.
Note: my version of Dreamweaver is a little different. You have to manually insert a link from the menu.
From the menu choose "insert -> hyperlink". Enter the link as follows:
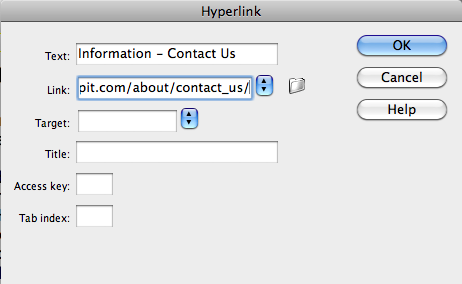
If you have done it correctly the text will turn blue as a hyperlink. Let's take a moment to try it and make sure it works. This step isn't in the book but I think it's worth the time. First save the file (file -> save) then select the earth link above the document window: ![]() and select Explorer or Firefox from the menu.
and select Explorer or Firefox from the menu.
The page will pop up and you can test the link.
CSS
Starting on Page 15 the book asks you to modify the style sheets for this site.
When you created the page from a template, Dreamweaver also created a style sheet that lists the font styles and other information about this page. The CSS file allows you to redefine some of the basic tags such as h1 and h2. You can set font, color, placement, and many other options. And some of these have already been set as part of the style sheet created with your page from the template.
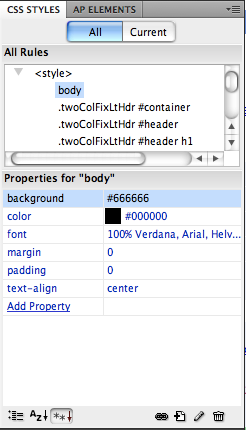
In the "CSS Styles" box select "body" as shown below, then select the box next to "color" so you can choose a new color. In my diagram the color box is black, click and change it to another color. The book suggests white but you can set it to anything you like.
Note: you may have to resize some of the panels to make all of this visible. You can drag the edges of the panels to make them bigger or smaller.
Try setting the background to red, and then view the page in Explorer. Then set it back to white.
In the background Dreamweaver has made some changes to the style sheets. We will take about that more later but for now it's enough to see that it works.
Insert a Graphic Background (Page 17)
Our next task is to insert a graphic background for the header bar. It currently reads "your vacation wonderland awaits". Click your mouse someplace on this. Then have a look at the "tag selector" which is the bar at the bottom of the document screen. Select the tag <div#header>. If you are confused have a look at this image:

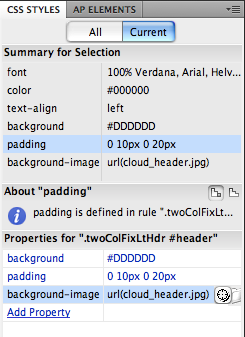
Go to the CSS STYLES panel and click "Current". This will show the CSS settings for the selected tag. You can attach CSS commands to any html tag.
Note: I find it REALLY CONFUSING that we are learning how to modify these tags without first learning what the tags are, but I didn't write the book. I will try to explain as we go along. I think the folks at Adobe are trying to give you a lot of "Gee Whiz Look Ma" but all they are doing is making this difficult and confusing. Sigh.
OK, we have displayed the current style options in the CSS panel.
Select "add property" and "background image". Click the little file button to the right of the "background image" property and select the file "cloud-header.jpg". Your CSS panel should look like this now:
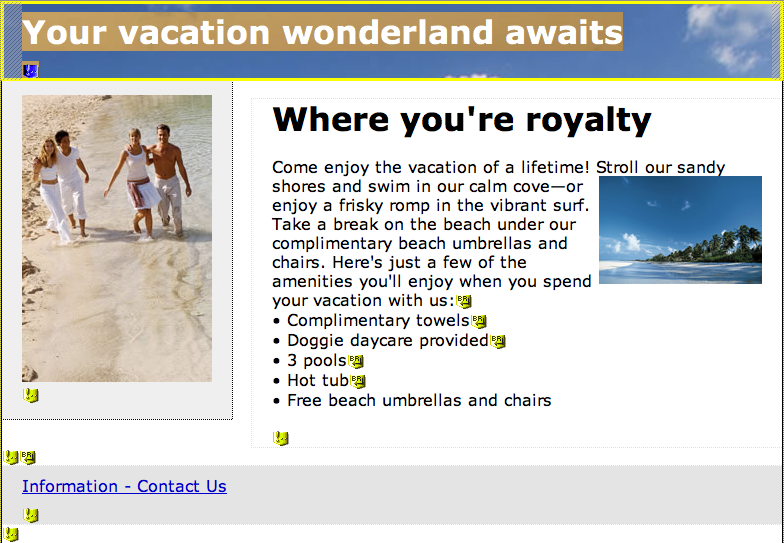
If you have done this correctly then your page should look like this:
Note: I have my preferences set to show those little yellow marks on the page, you may or may not see these depending on how the options are set.
You can hit the explorer button as described above to view this page in the browser.
Pages 19-25 go on and show you how to set font styles using css. Give this a try and see if you can make it work. Remember the tags are listed across the bottom of the screen. H1 is a header tag. Other tags have more complicated names. The text above this paragraph has the following tags:
<h2>Editing Tags</h2>
With the CSS panel we can modify this tag to change how this type of font style looks.
The general procedure is to find the thing you want to change, click on it, see what kind of tag is hilighted in the tag bar, and then go to the CSS window to change it.
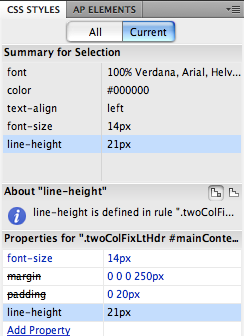
Here's how to complete the excercise on page 21. Click on the word "umbrella" which is in about the middle of the main text in the document window. The select "DivMainContent" from the tag bar across the bottom of the document screen. Now go to the CSS window and set the font size to 14 and the line height to 21. This will adjust the vertical spacing.
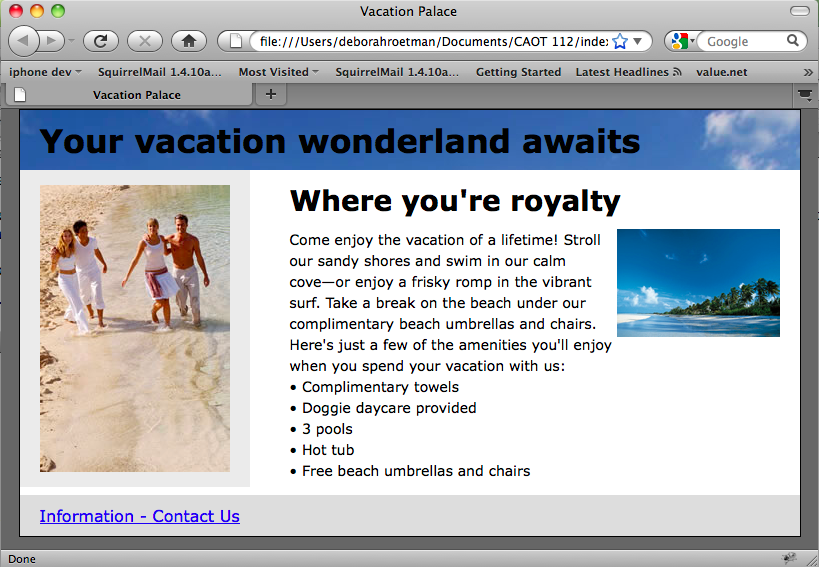
Click on the ![]() button to preview. You should see something like this:
button to preview. You should see something like this:
Excellent, we're done!